Xylorix Harvester
Overview
Xylorix Harvester is the dedicated app for collecting wood image data in an organized manner and greatly simplifies our users' data collecting process.
Wood Specimen Preparation
- Minimum 15 specimens per wood species for model building is recommended, preferably with varying age and moisture level (air-dry or fresh), and from different trees.
- Each specimen should be correctly labeled with their scientific/species name.
- Razor/Knife cut is recommended as a surface preparation technique.
- Cut the wood specimen along the end grain to produce a refreshed wood surface with visible macroscopic features.
- Users are recommended to collect Negative wood samples as well.
- Negative wood samples are wood species that users do not want to include as part of the models. For example, wood species that are often mistaken for the wood species that users want to build the model with.
- Negative wood samples are prepared normally as stated above. More instructions will be given in the Data Collection Process section.

Equipment Preparation
- If you have acquired our dedicated wood identification kit, the WIDK-24X01, you may follow the provided instruction manual found on our product page at https://www.xylorix.com/products/widk24x01.
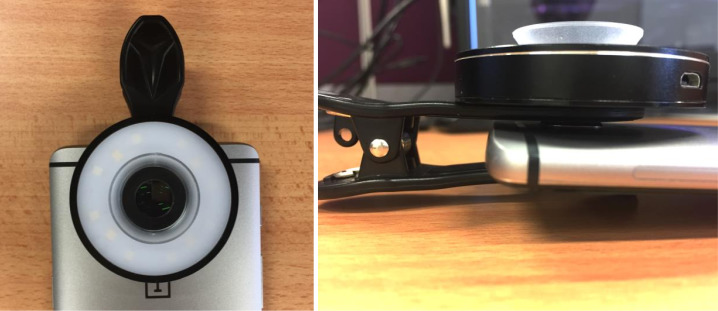
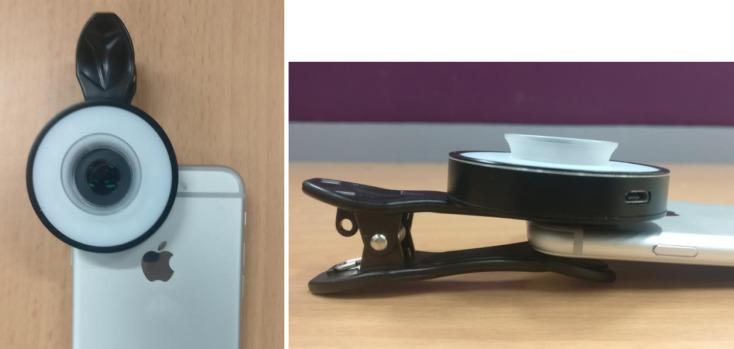
- The WIDK-24X01 came with an attached ring light that eliminates lighting issues that may affect the usefulness of taken wood sample images for the model building process.
- Mount macro lens onto smartphone back camera (refer to images below).
Data Collection Process
- Prepare the specimen by cutting on the wood end grain surface to create a refreshed wood surface.
- Open the Xylorix Harvester App, create a new Category for the wood samples by naming the Category its preferred genus/trade/common name. Then tap on the "camera" icon to start a new data collection form by:
- Select category of the wood sample
- Type in the wood sample's species name
- Select the color lightness (light to dark) of the wood sample surface as observed
- Type in the specimen ID of the wood sample (e.g. A01, scientificname-sample1, etc.)
- Select the image number to be taken for the collection
- Tap "launch camera" to begin data collection
- Using the Xylorix Harvester App, capture 10 images of the freshly cut surface, with varying orientation (rotation). Ensure that the macroscopic features are clear and visible to the human eye (adequate brightness, exposed area with macroscopic features).
- Repeat the process for the next cut; 10 cuts per specimen is recommended.
- For Negative wood samples, simply create a new Category and label it in the Description, e.g. 'Negative Samples For XX'. Then proceed with the normal collection process as stated above.
How To Use The Xylorix Harvester App
The procedure of using the app for data collection is illustrated below, step-by-step:
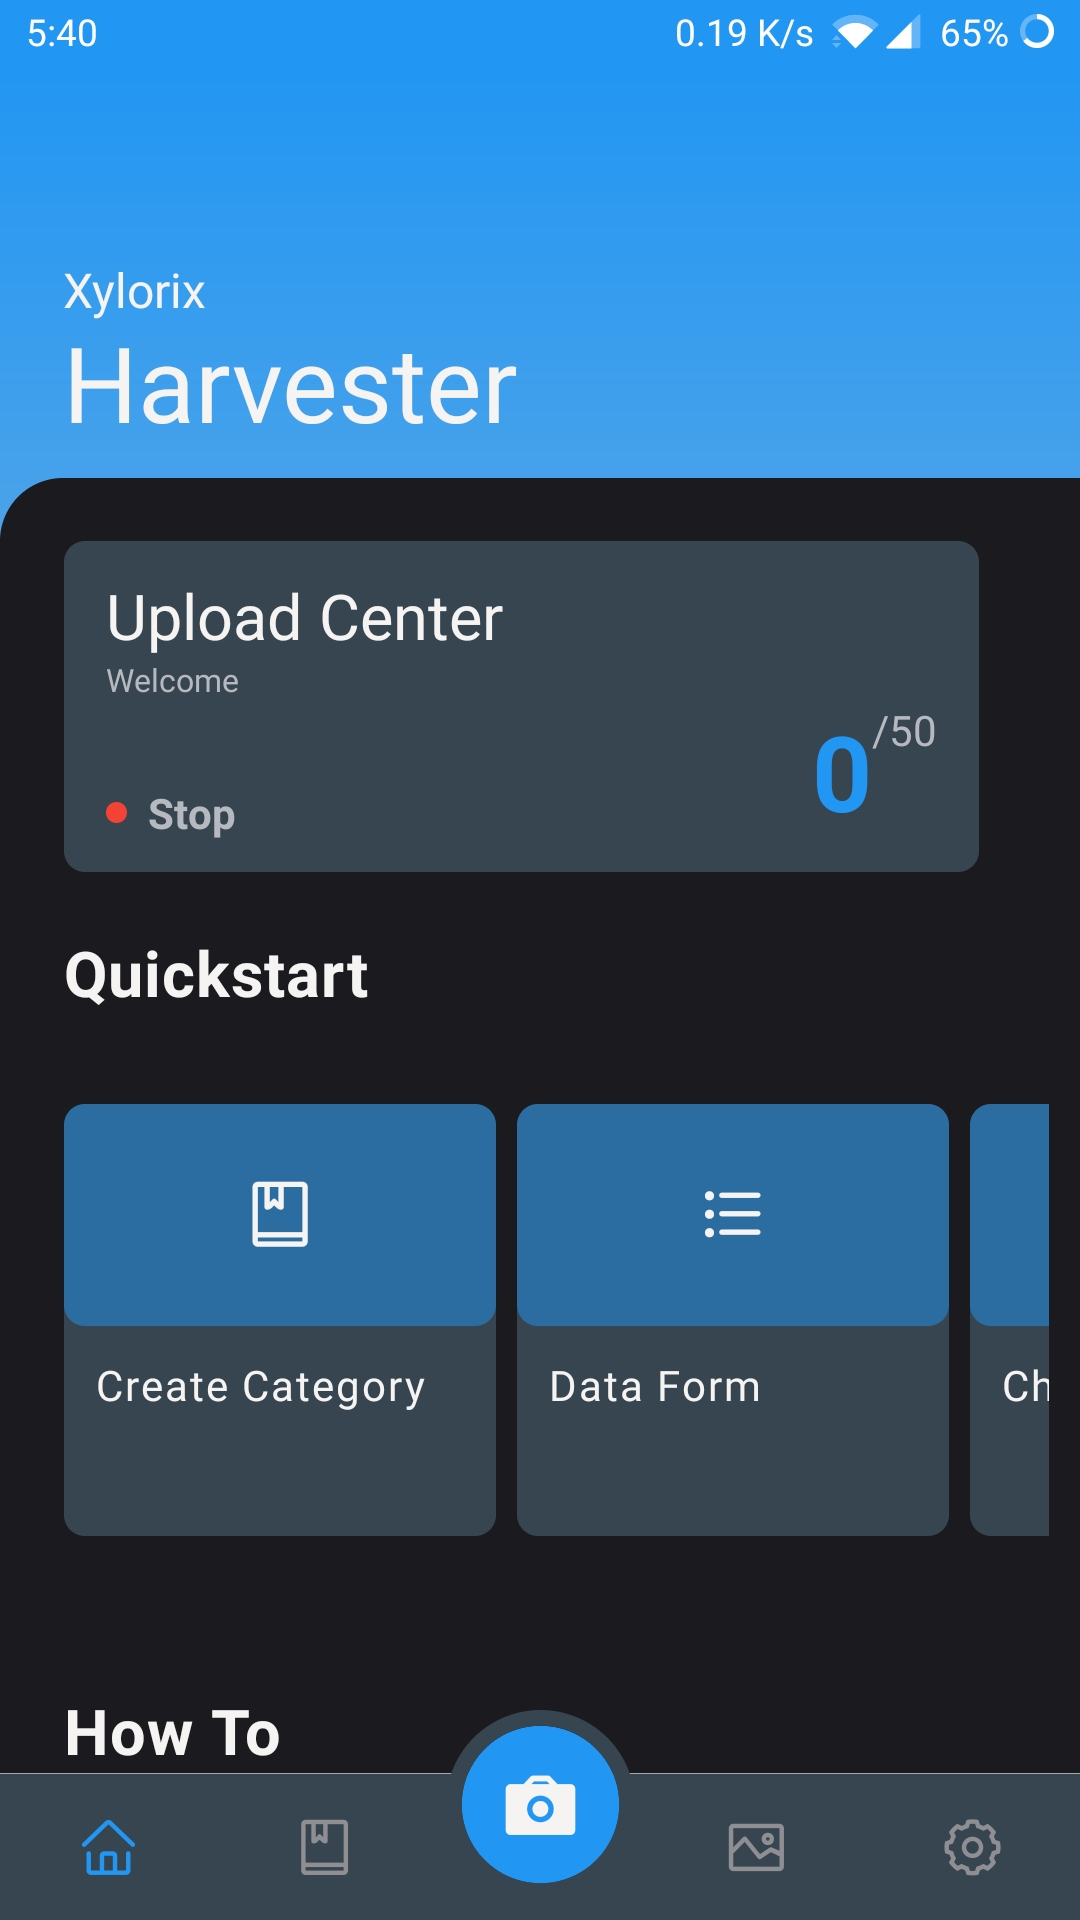
On the Home page, you can follow the Quick Start section step by step to get started with the data collection process. You can find a series of help guides in the How To section if you have any questions regarding the usage of relevant tools.
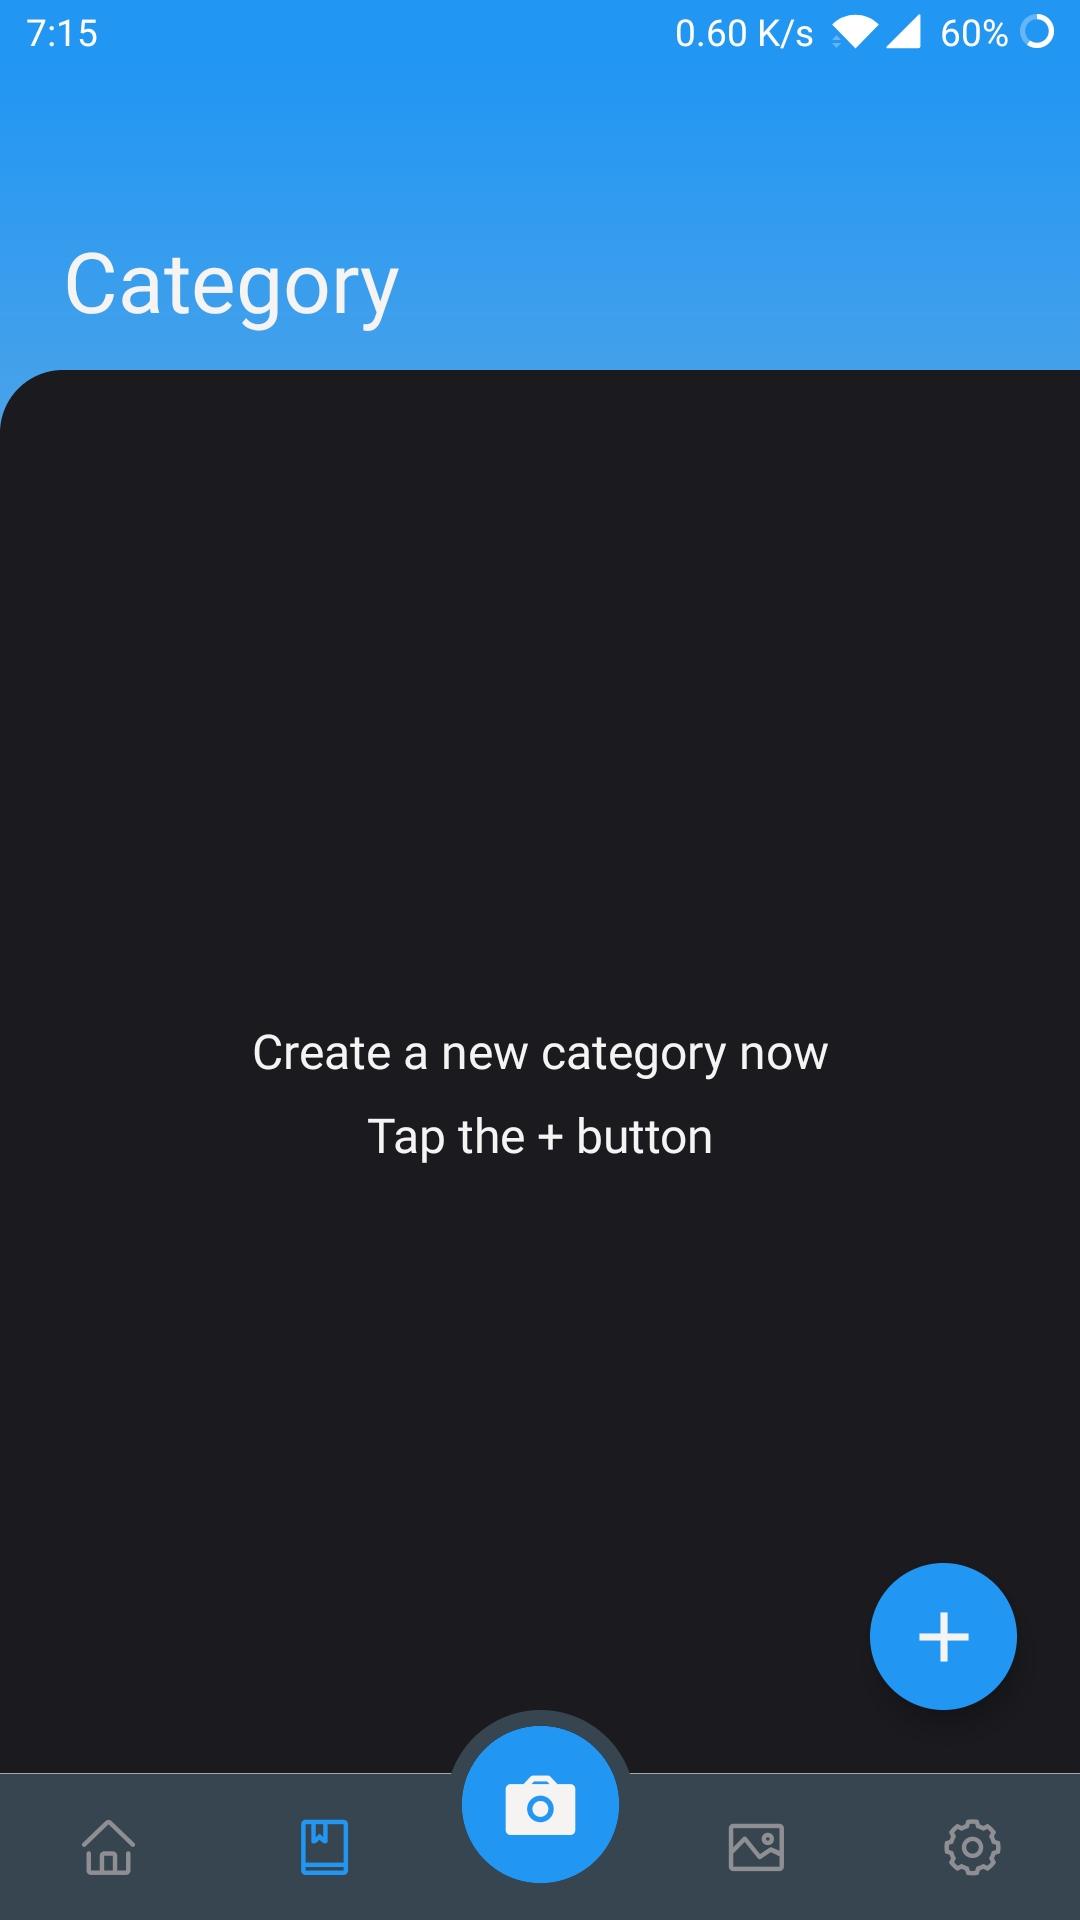
Navigate to the Category Page to see the list of created Categories. Tap on the Add New Category at the right-bottom corner to create a new category.
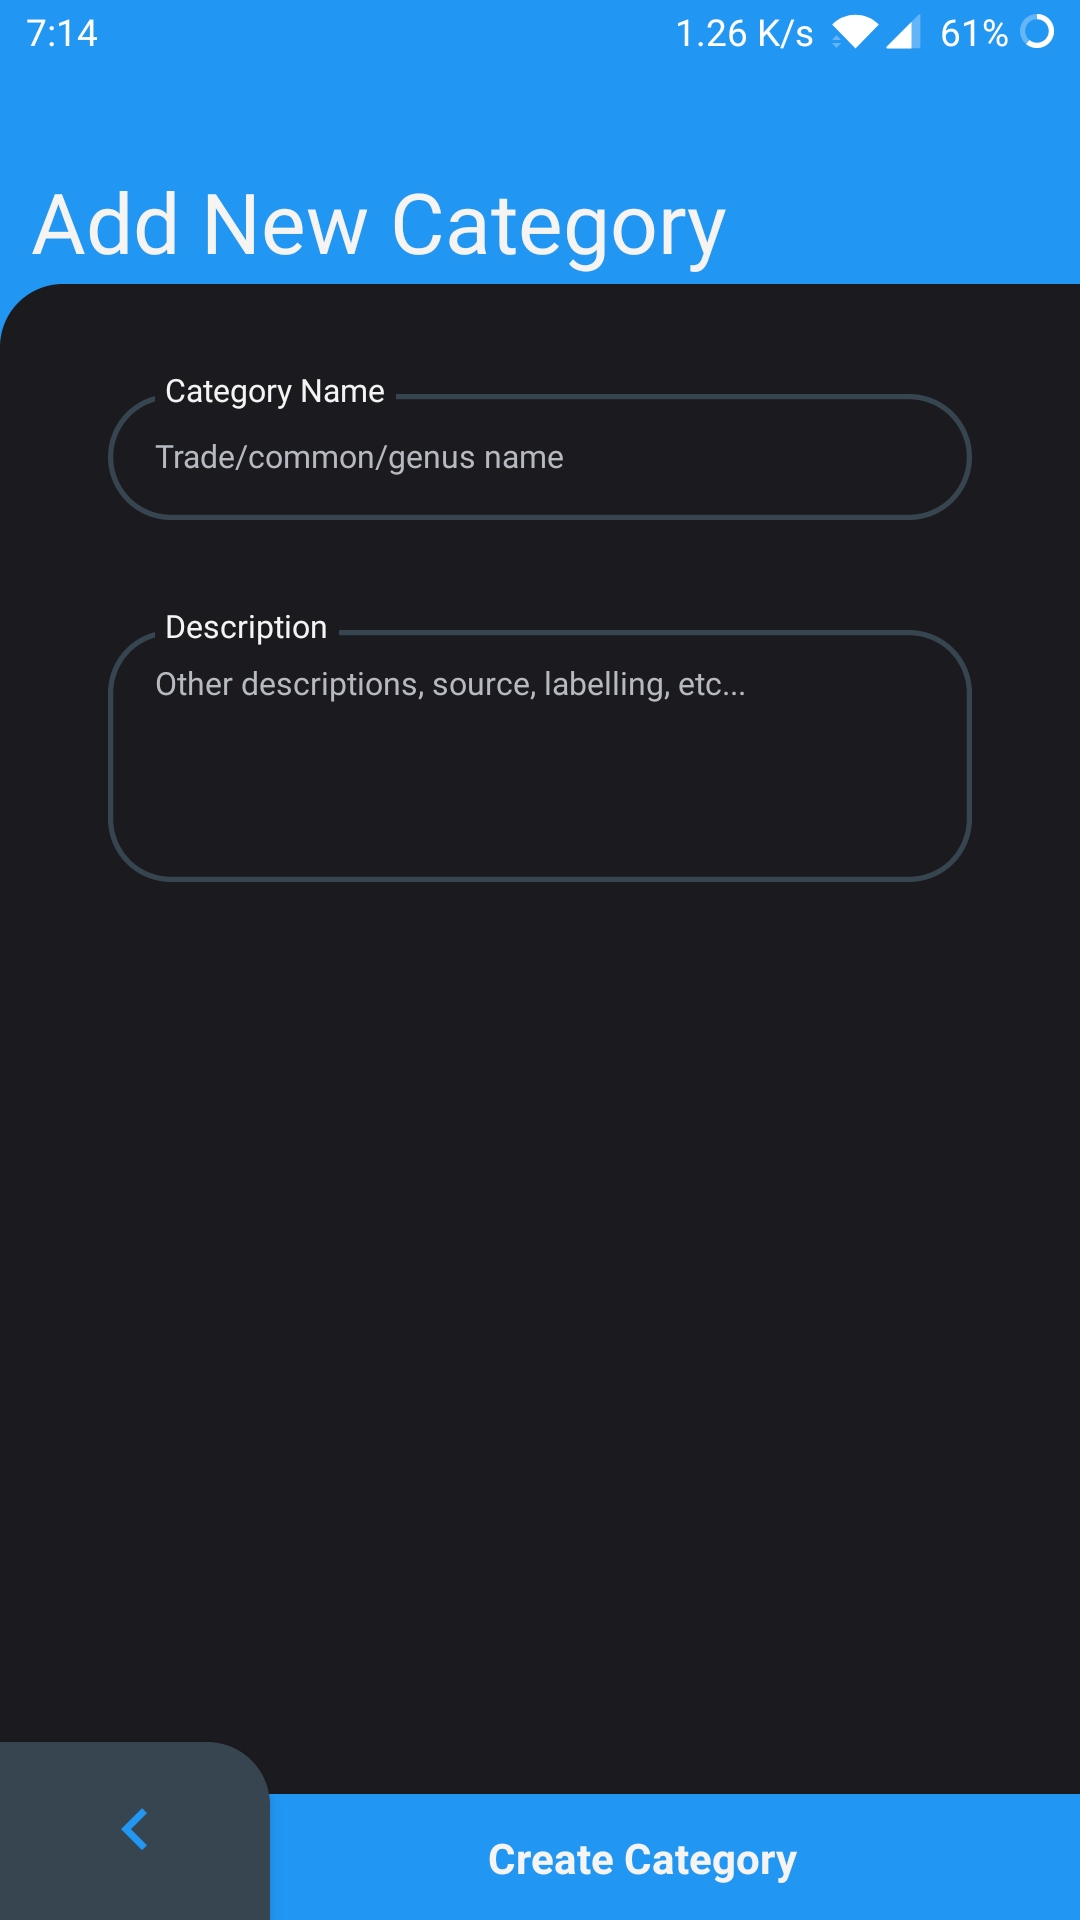
Add a new Category by typing the wood genus name, trade name, or preferred common name for the Category name. Then add any description for the wood category such as owner of wood, labelling, etc. Once done, click "Create Category".
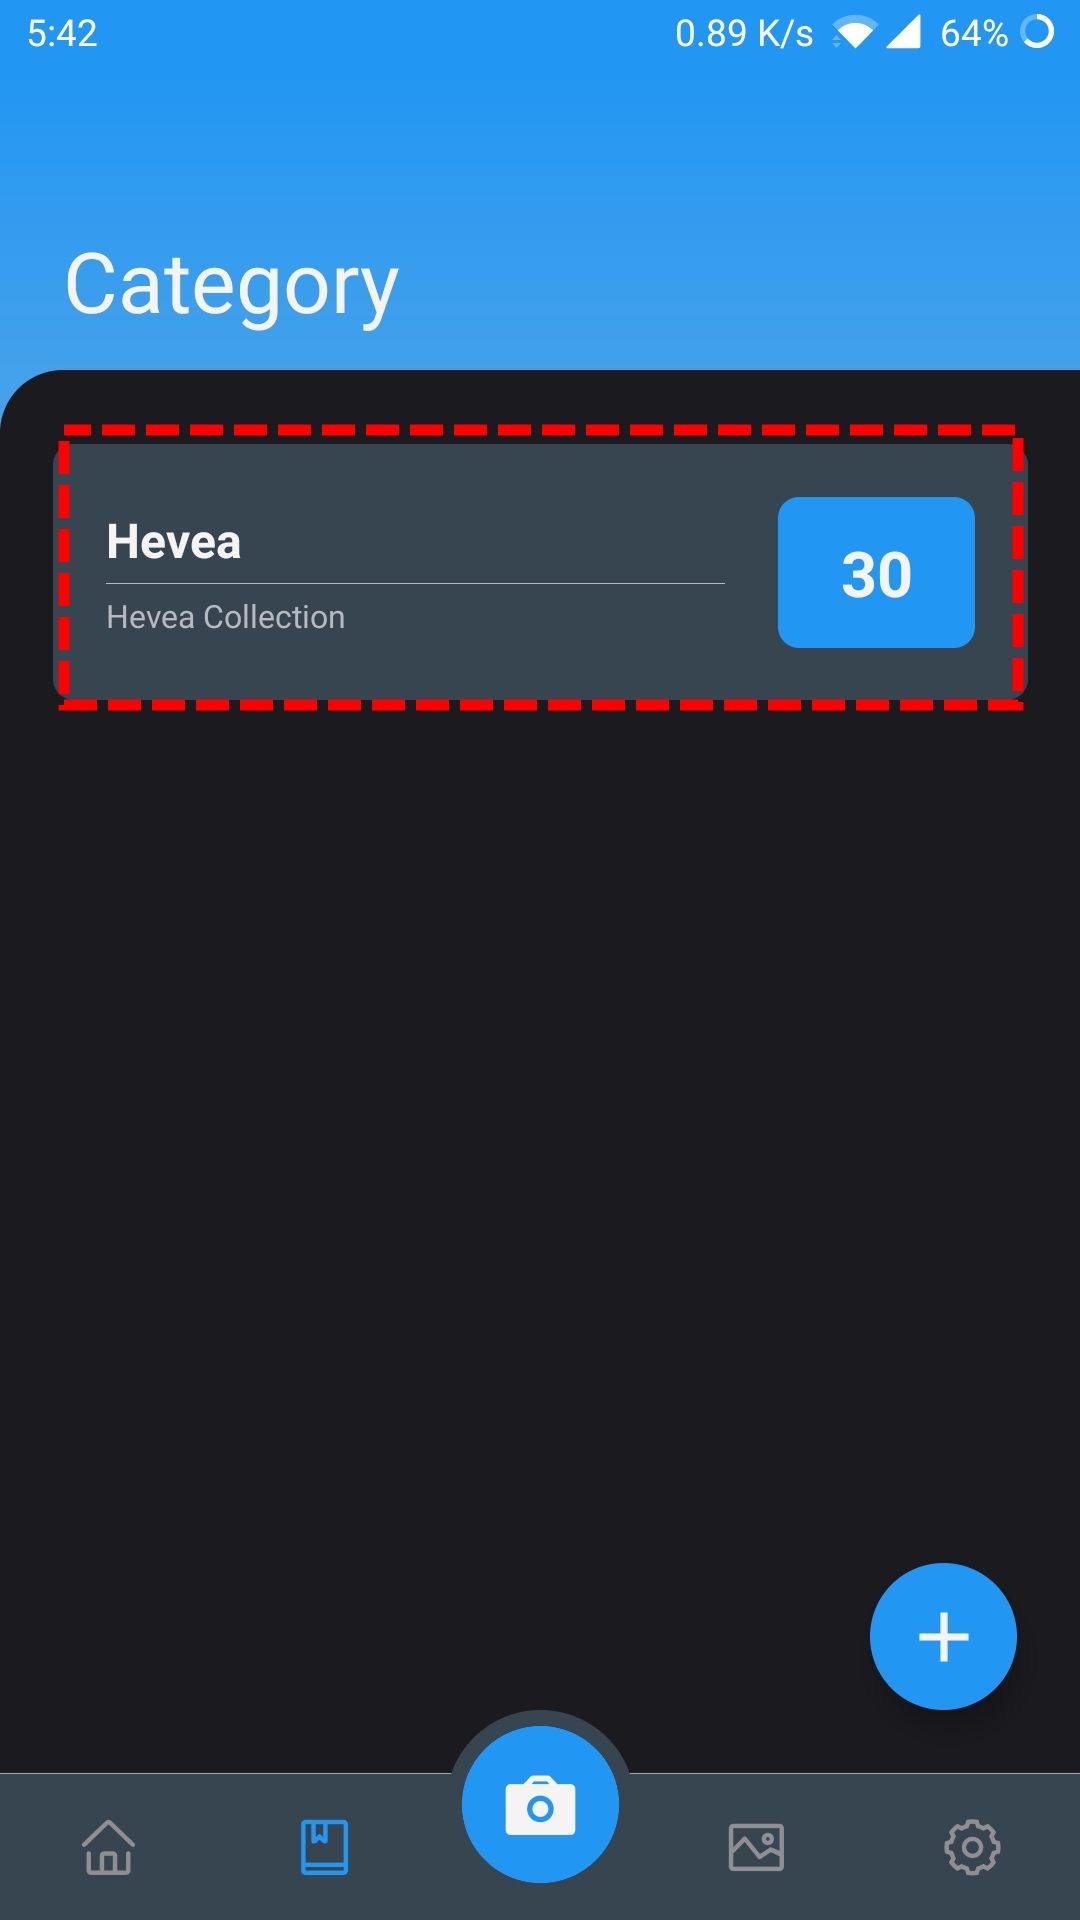
After the Category is successfully created, it will show on the Category Page here. You can tap on the category (red-lined area) to see its details.
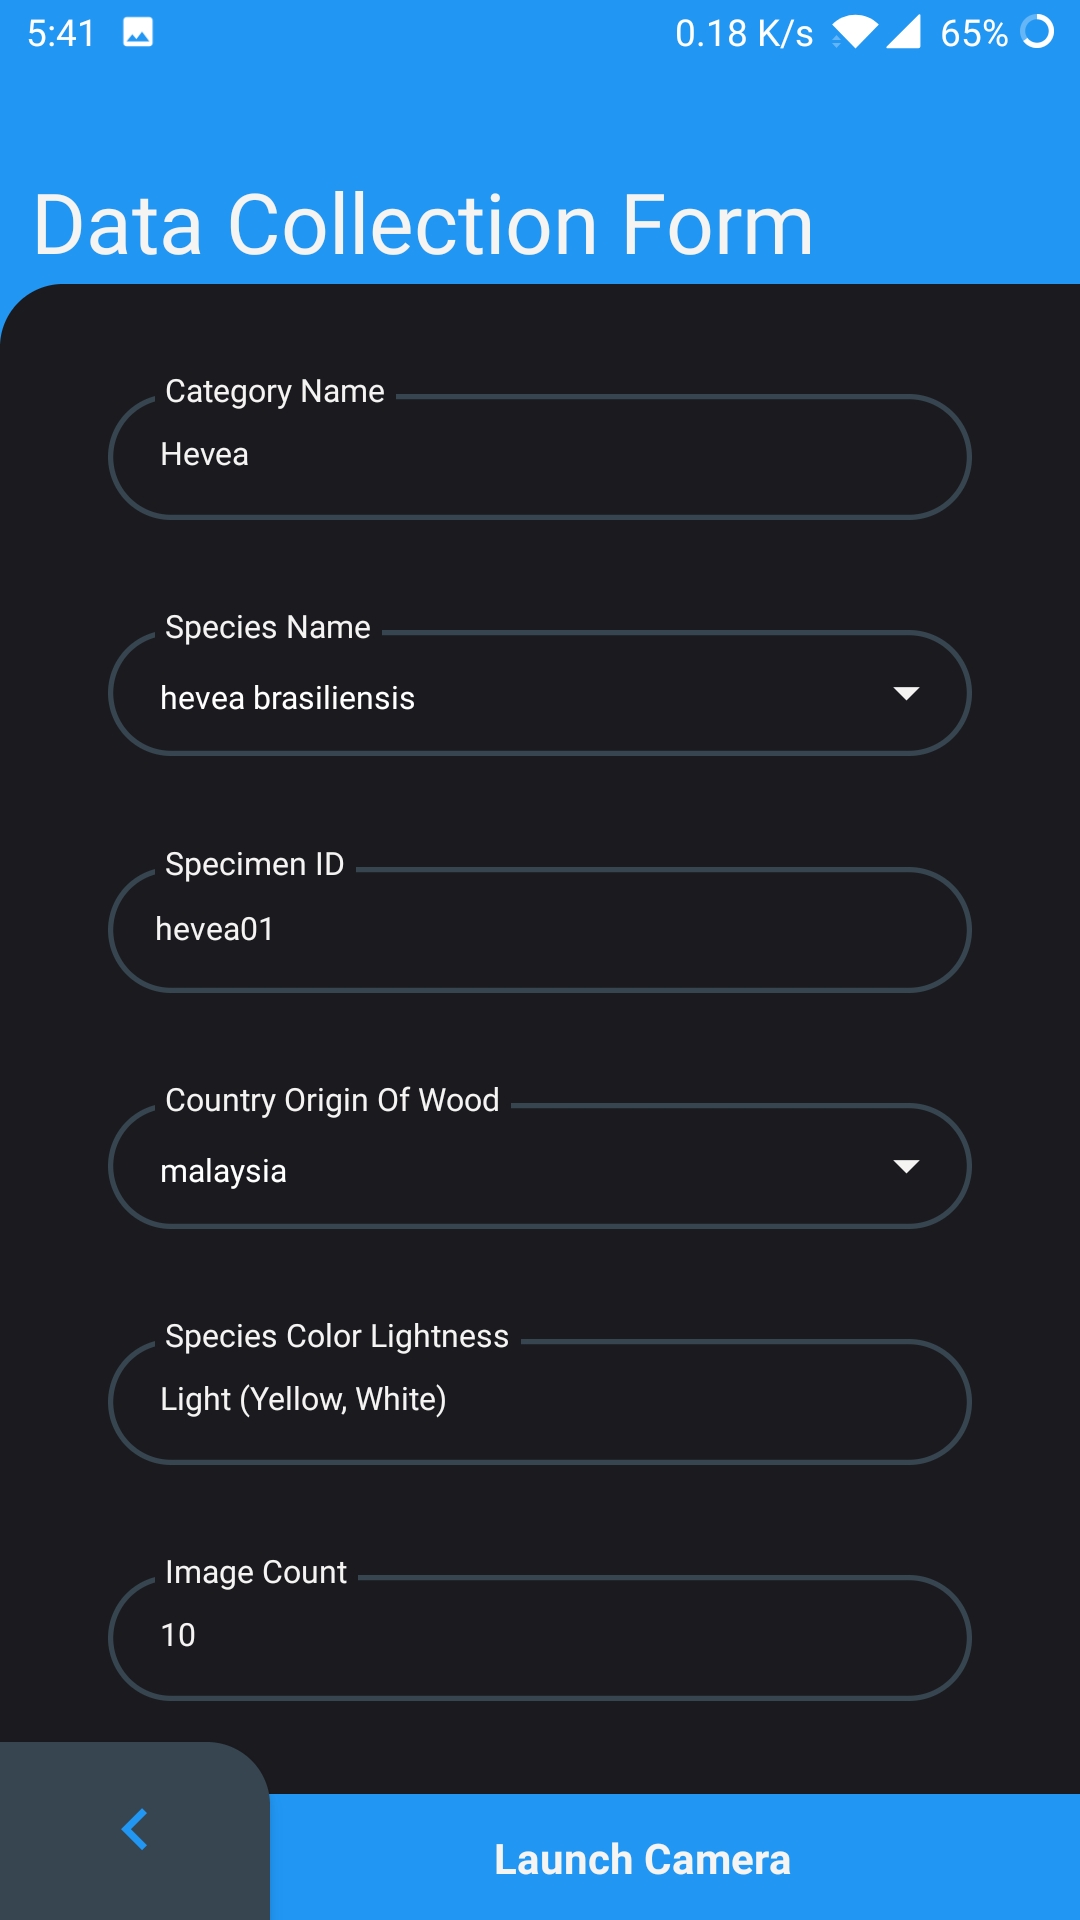
Tap on the "Camera" icon in the center of the bottom bar to go to the Data Collection Page. First:
- a) Select the wood category to be collected.
- b) Type in the species name of the wood specimen or select from the dropdown by tapping on the "down-arrow" at the right.
- c) Type in the country name of which the wood specimen originated from, or select from the dropdown.
- d) Choose a color lightness that most resembles the color of the wood specimen.
- e) Type in the preferred specimen ID/name of the wood specimen.
- f) Select the image number to be taken.
- g) Once all the information is filled in, begin the data collection process by tapping the "Launch Camera" button.
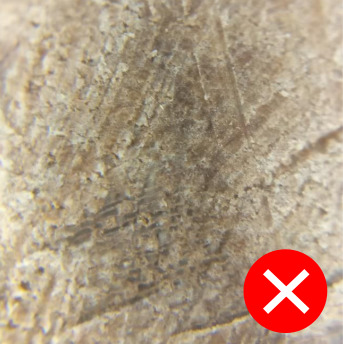
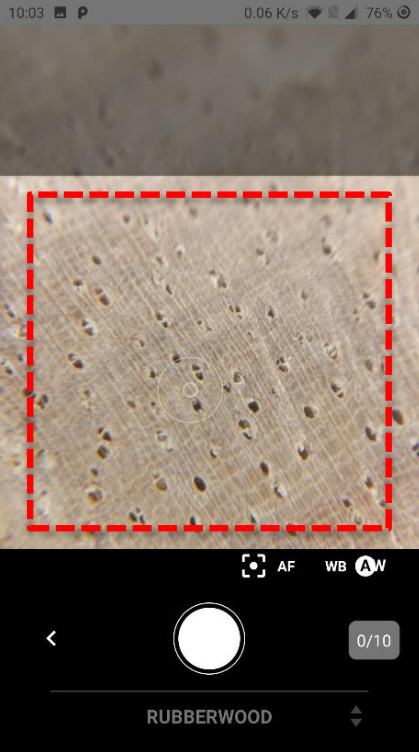
Capture macroscopic images of the wood surface. Make sure the images are clear and sharp in the center of the image as indicated by the highlighted area. Press the white circle button below to take a picture.
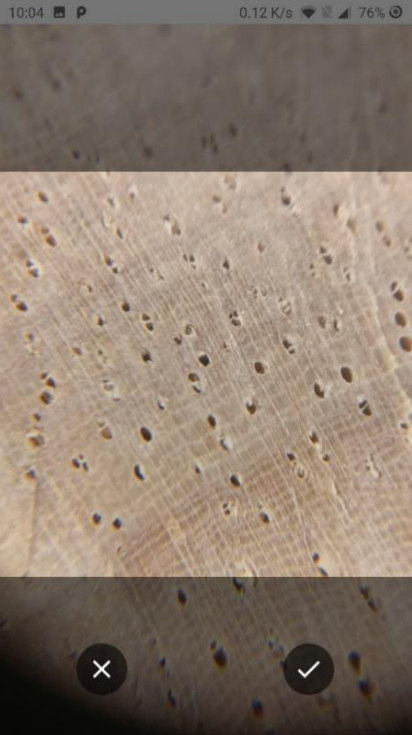
After the picture is taken, tap the right (tick) button to confirm submission. If the picture appears unclear or has other issues that affect its usability, tap on the (x) button to retake the picture.
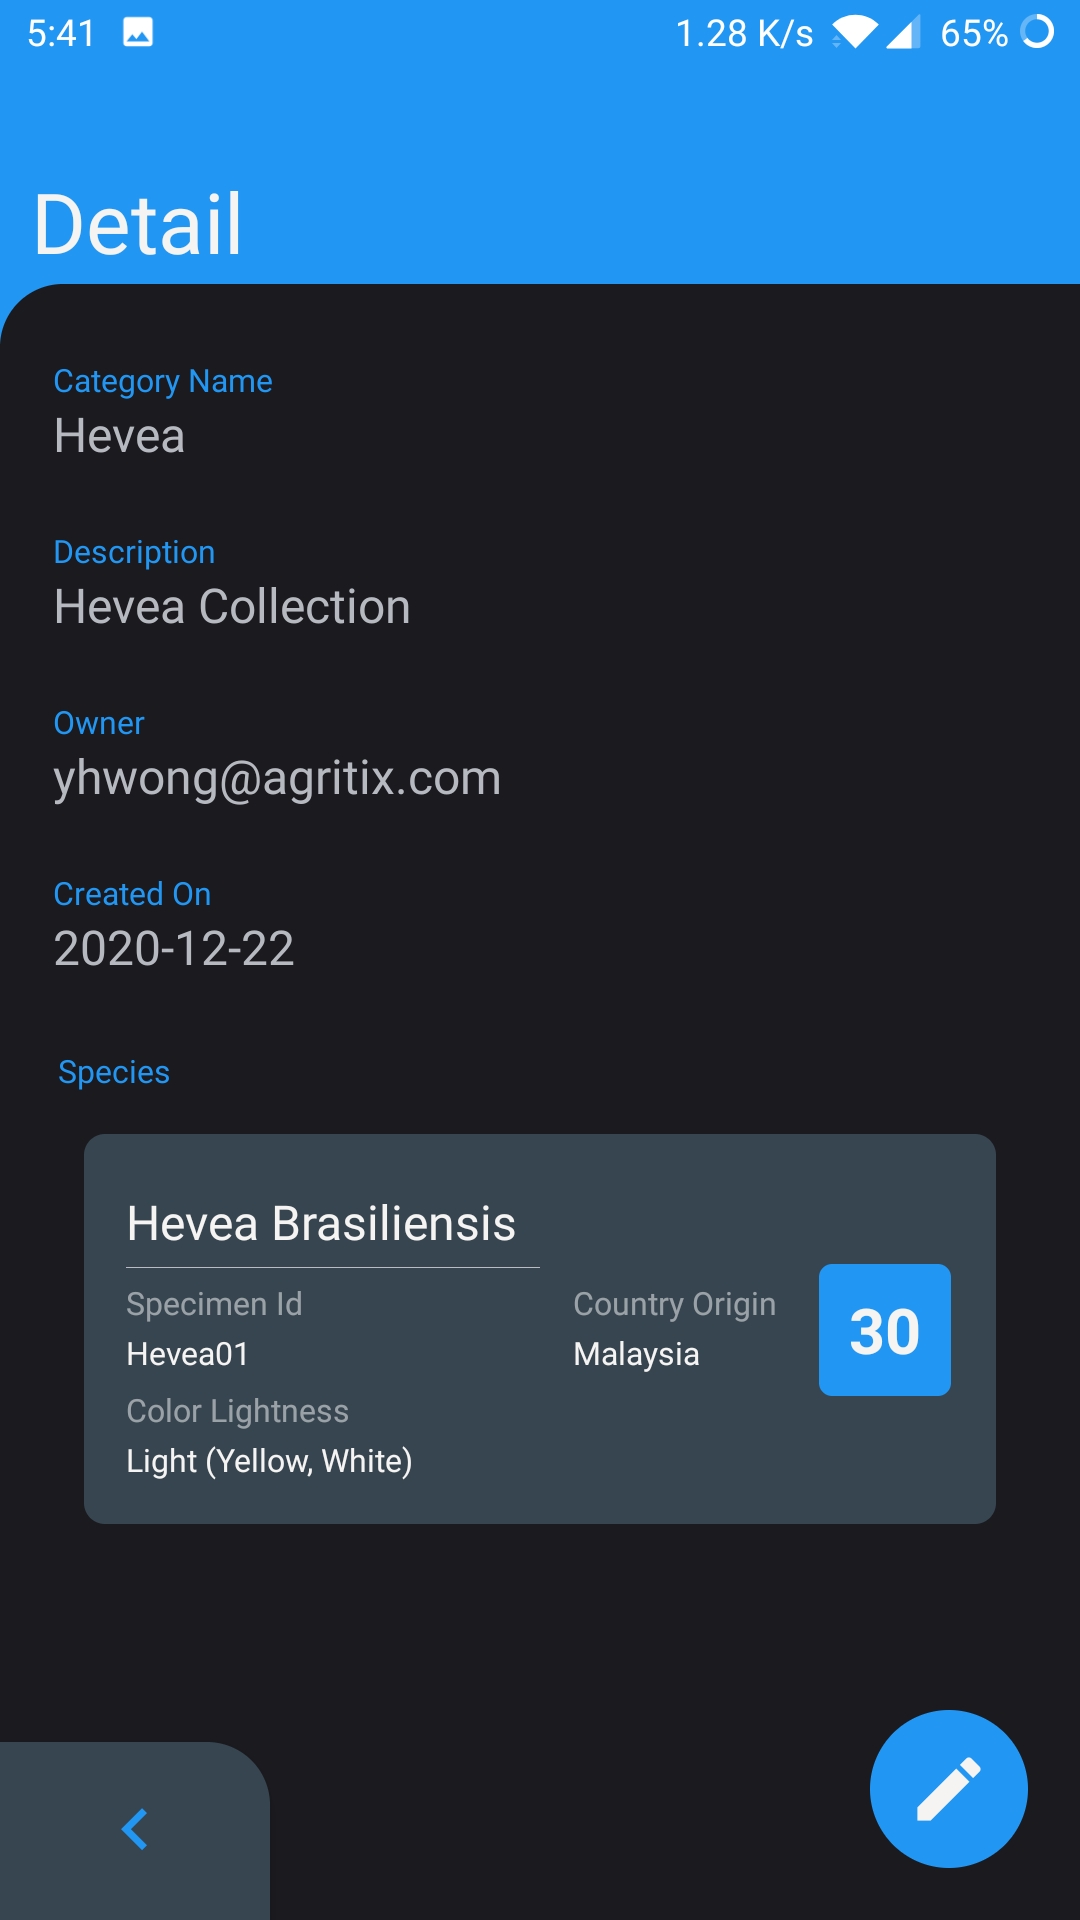
After the data collection process is completed, the details of the wood category will be updated with the collected wood species.
Check the Upload Center for any pending images that are not uploaded yet. Click on the "Upload button" at the right-bottom corner to resubmit the images.
