Xylorix Insider
Overview
Xylorix Insider serves as the dedicated tool for evaluating the performance of trained models by providing an organised procedure to collect images based on the models that are trained for the users.
Keywords
- Test: The evaluation test in which users would like to carry out on the developed models.
- Model: Image recognition AI (artificial intelligence) that carries out wood identification tasks, developed by the Xylorix team.
- Dataset: Grouping of images based on image type such as wood types, genus, objects, etc.
- Positive Dataset: Grouping of wood type images that should be identified by the trained model as the correct wood types. For example: Balau wood images for a Balau model.
- Negative Dataset: Grouping of wood type images that should NOT be identified by the trained model as the correct wood types. For example: Hevea wood images for a Balau model.
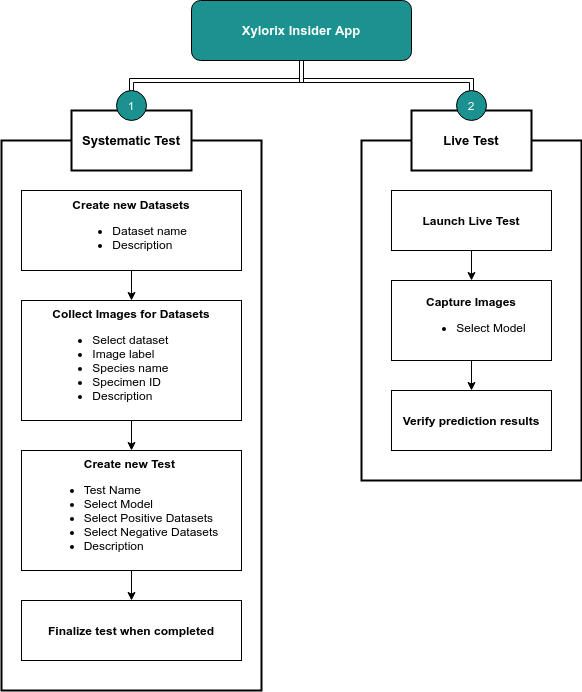
Main Features
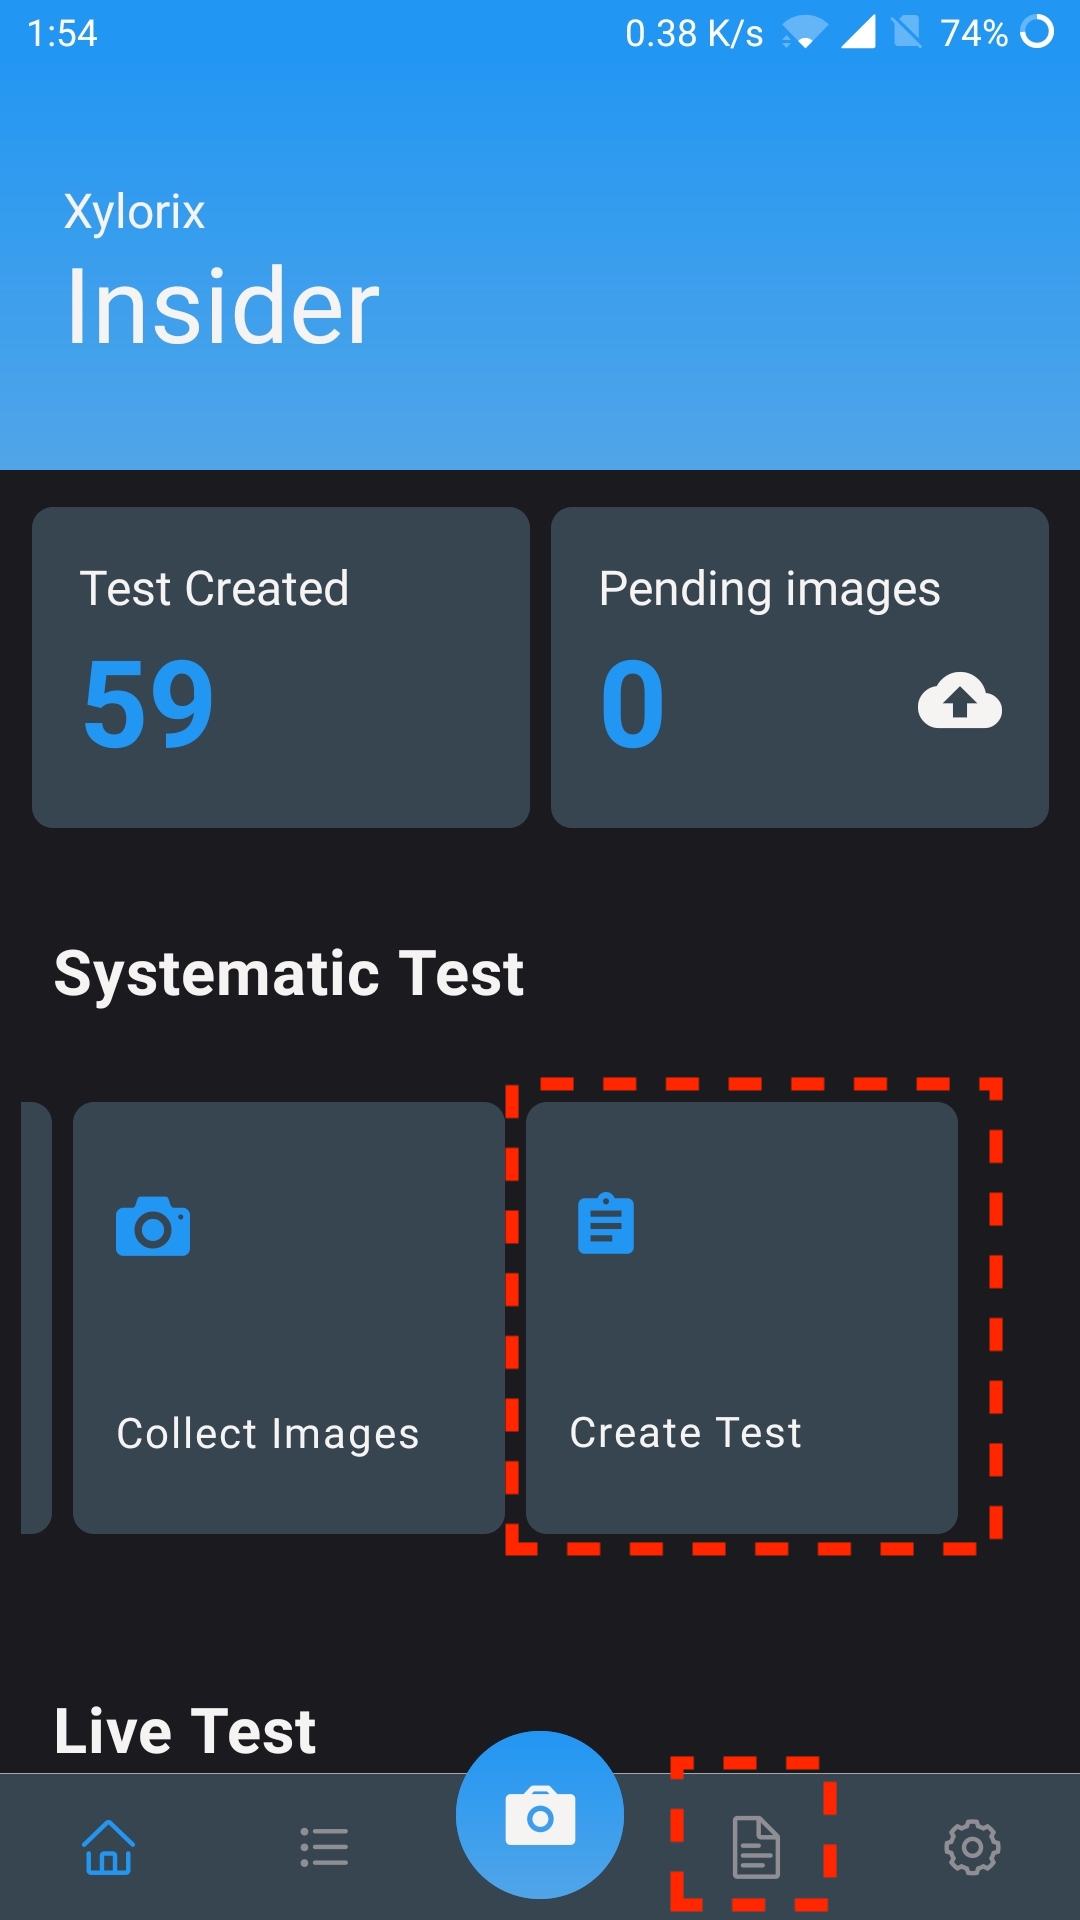
- Systematic Test: Provides users a concise and systematic way to evaluate trained models through images collected and grouped by their respective Datasets. Allows users to create tests for models in which detailed performance reports will be generated and available in the Xylorix Toolkit Webapp.
- Live Test: Allows users to quickly test out the trained models in the Insider App.
Insider Flow Diagram
Systematic Test Step-by-Step Guide
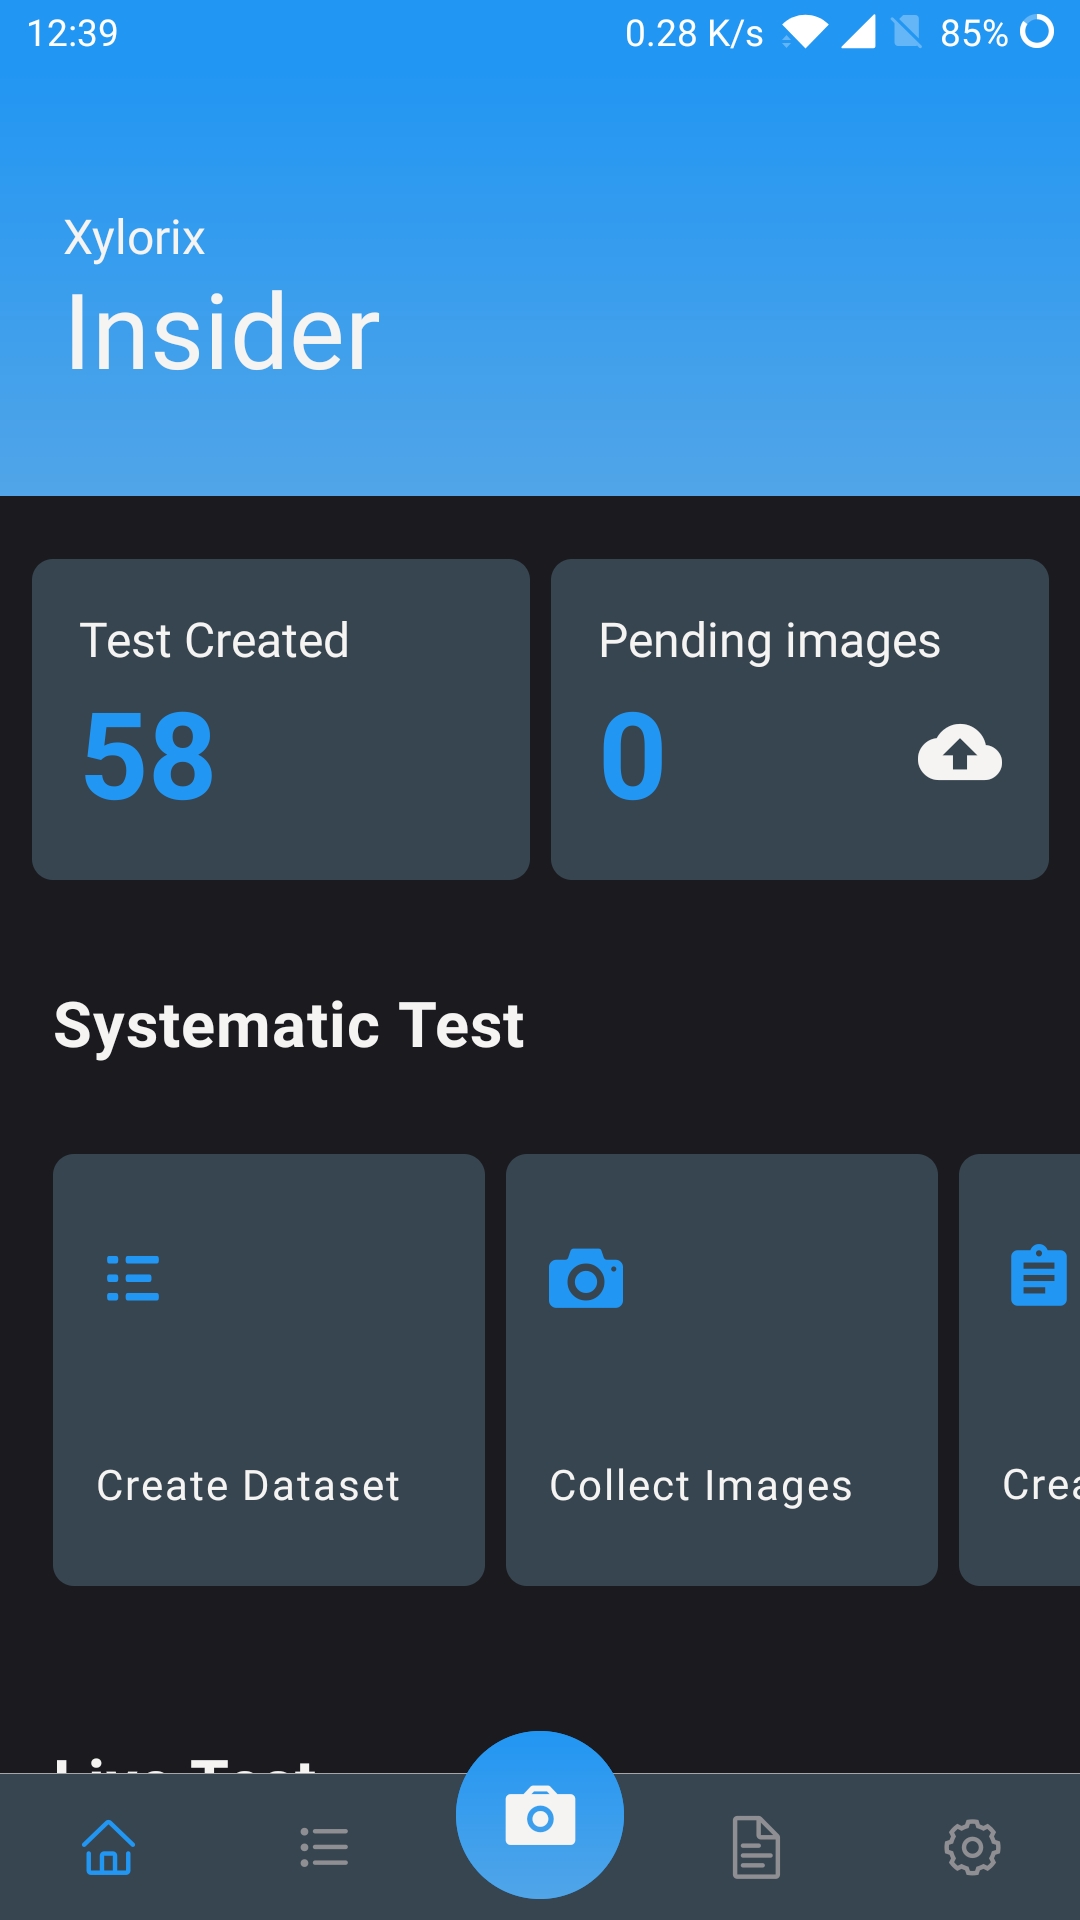
On the Home page, you can follow the Quick Start section step by step to get started with the model evaluation process. You can find a series of help guides in the How To section (bottom of home page) if you have any questions regarding the usage of relevant tools.
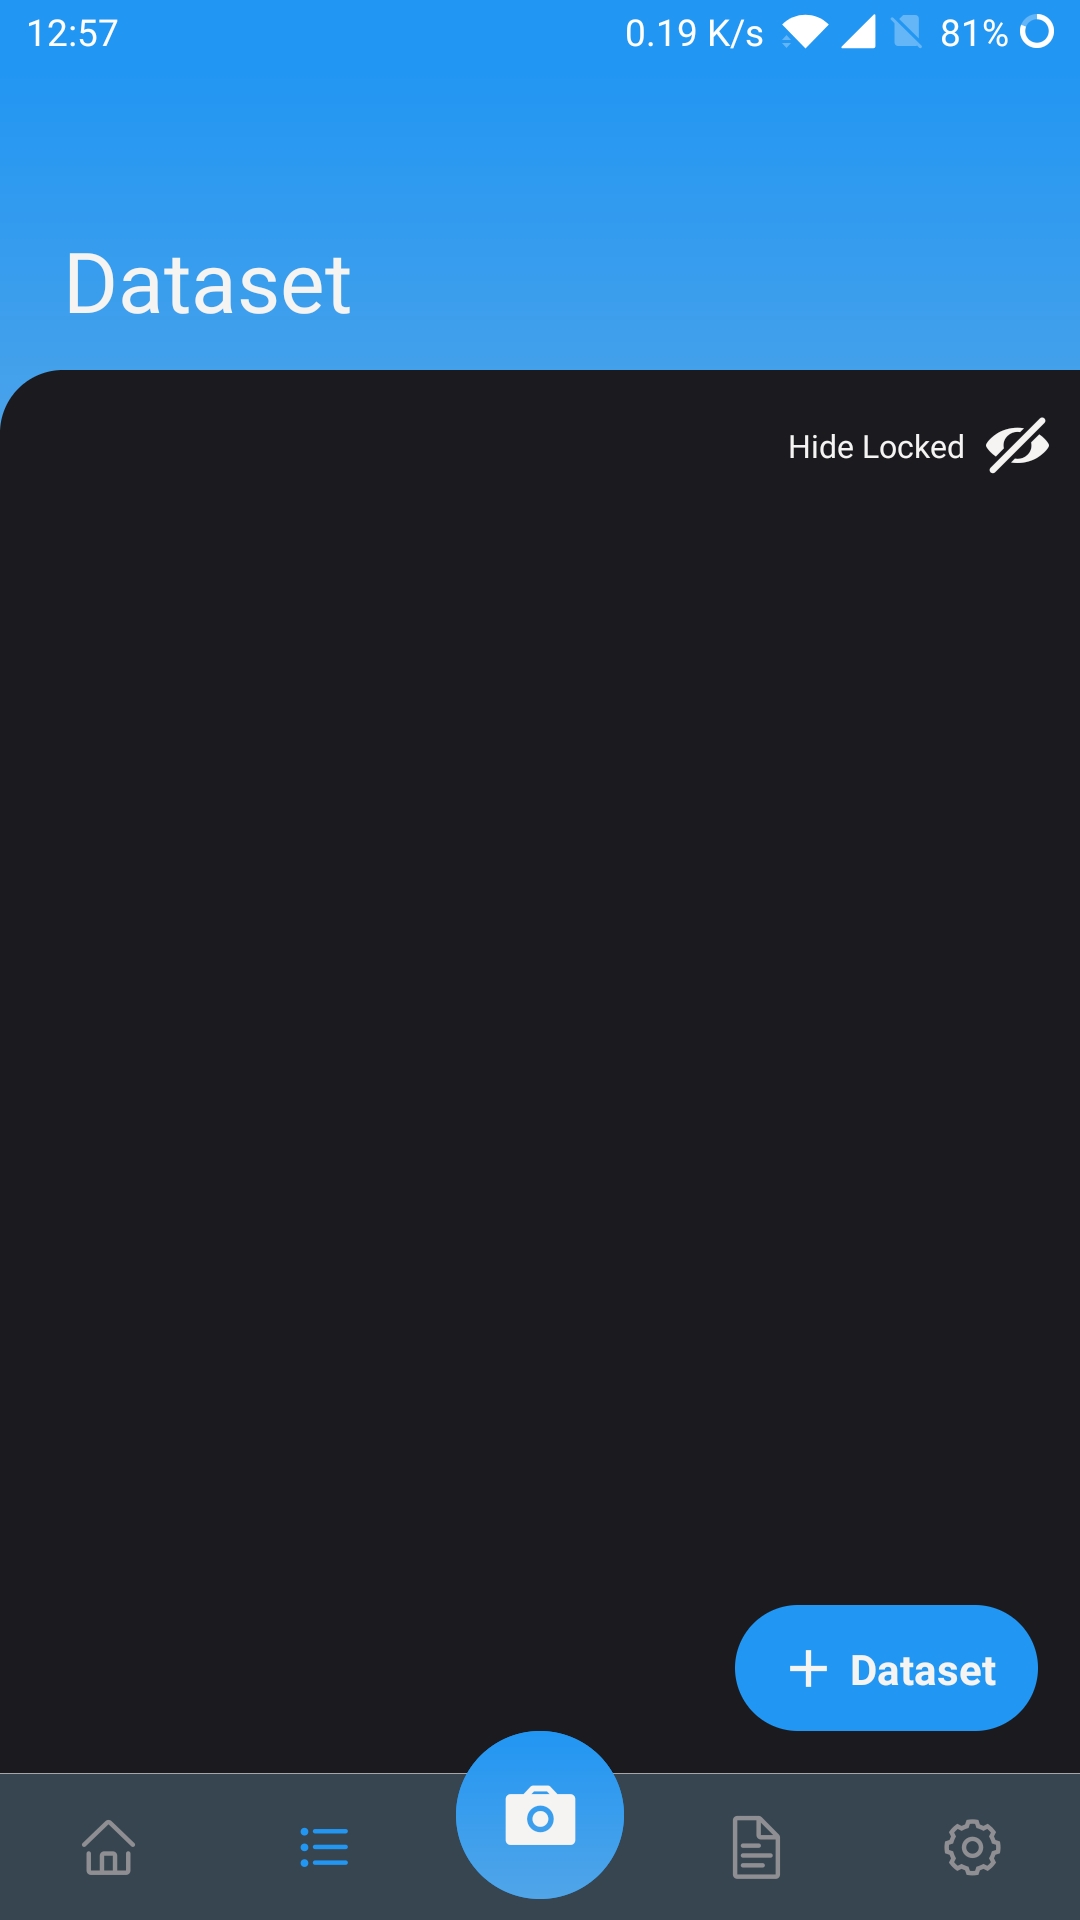
Navigate to the Dataset Page to see the list of created datasets. Tap on the Add button at the right-bottom corner to create a new dataset.
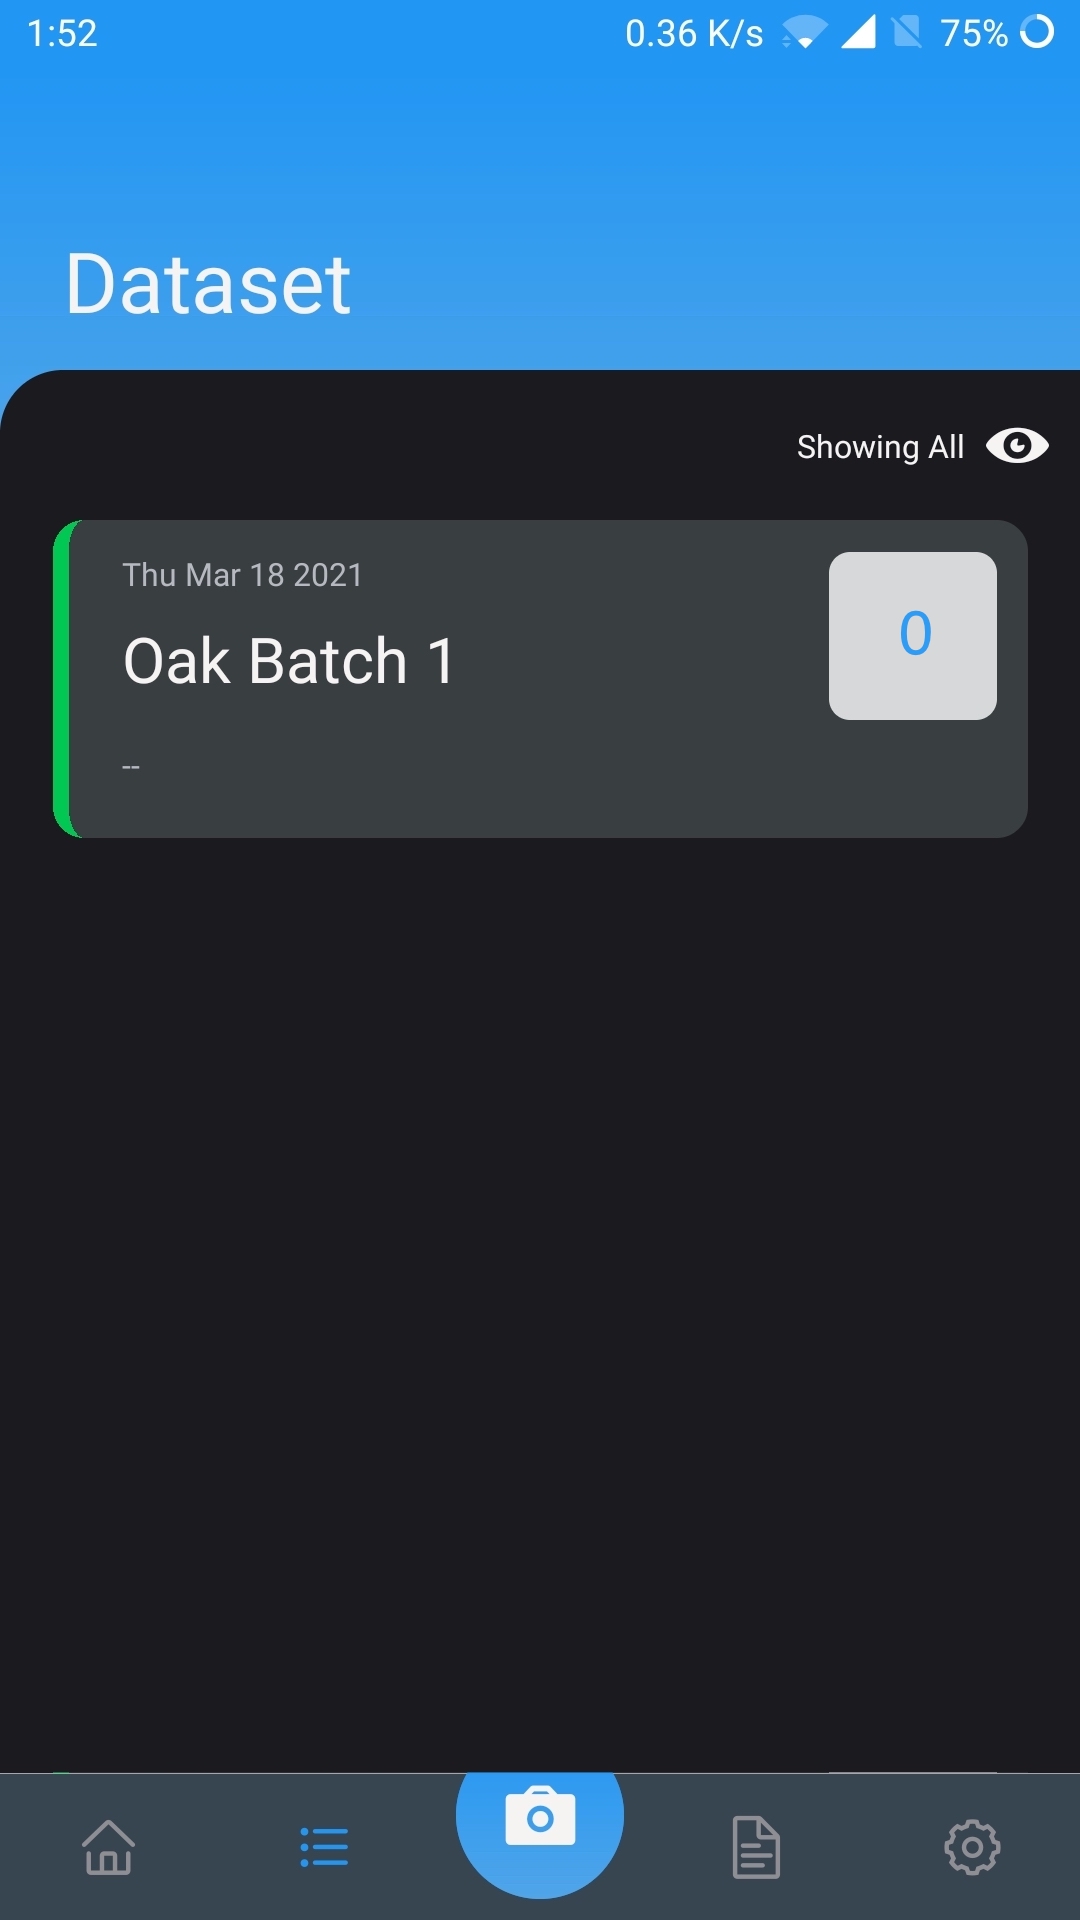
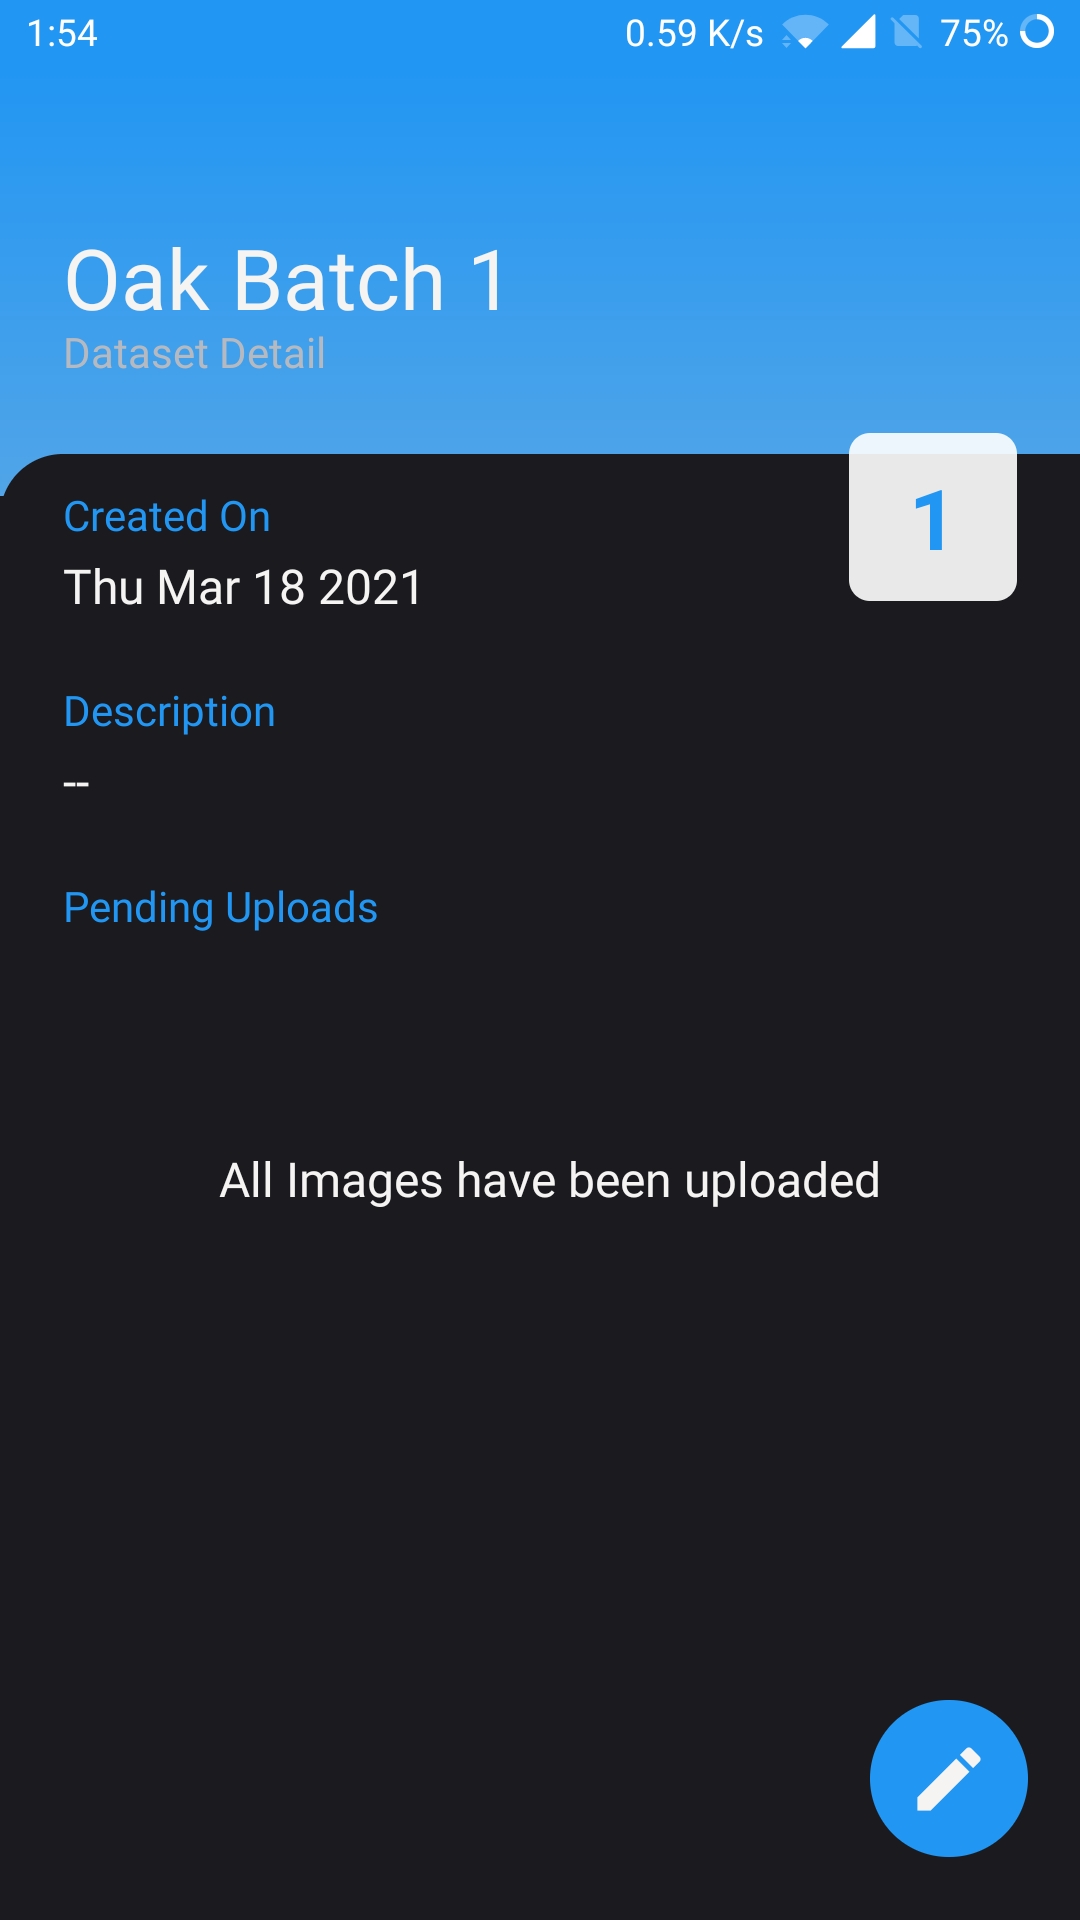
After the Dataset is successfully created, it will show on the Dataset Page here. You can tap on the Dataset to see its details.
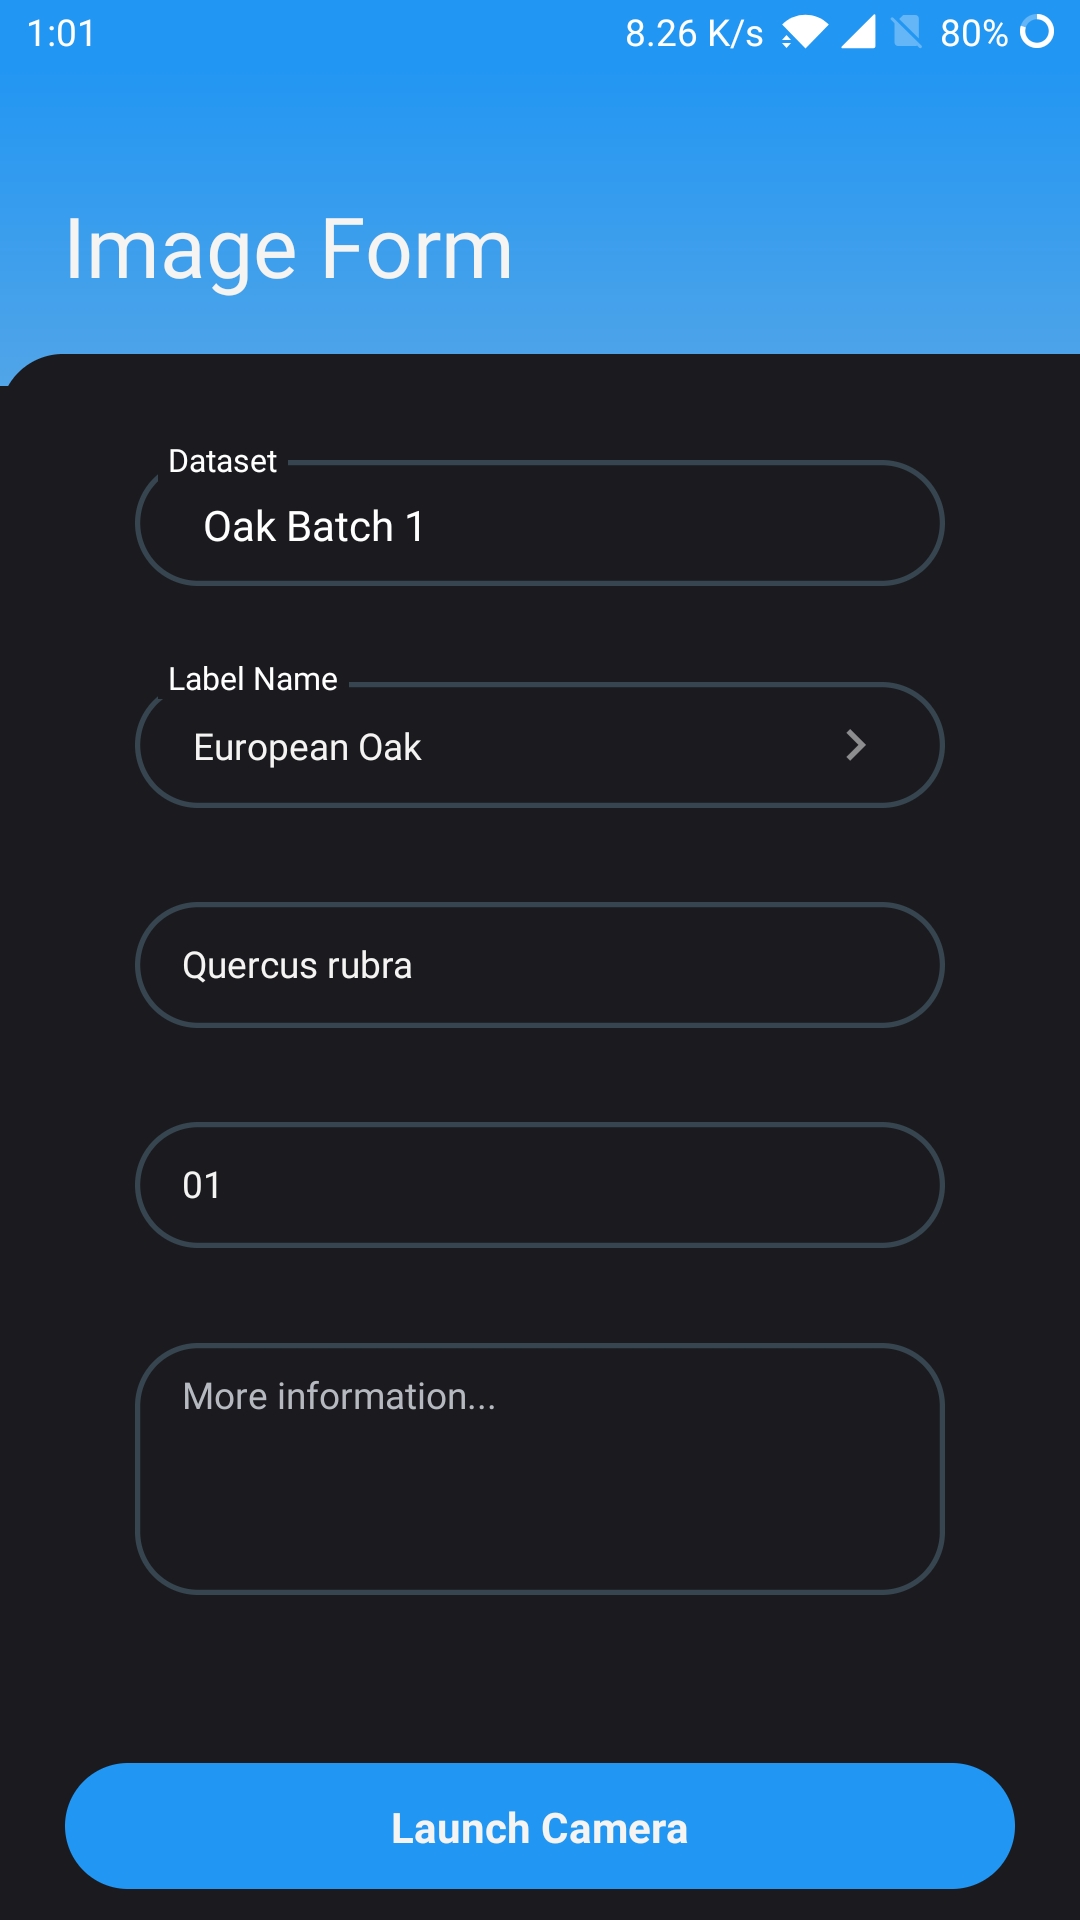
Tap on the Collect Images button or tap on the "Camera" icon in the center of the bottom bar to navigate to the Image Form page to begin collecting wood images. First:
- a) Select the Dataset for the images to be collected.
- b) Open the selection for label name and select from available options created from Harvester, or enter a new label for the images (e.g. wood type, genus, etc.).
- c) Type in the species name of the wood specimen which will be collected (Optional).
- d) Type in the specimen ID of the wood specimens (Optional).
- e) Enter any description for the image to be taken (Optional).
- f) Once all the information is filled in, begin the collection process by tapping the "Launch Camera" button.
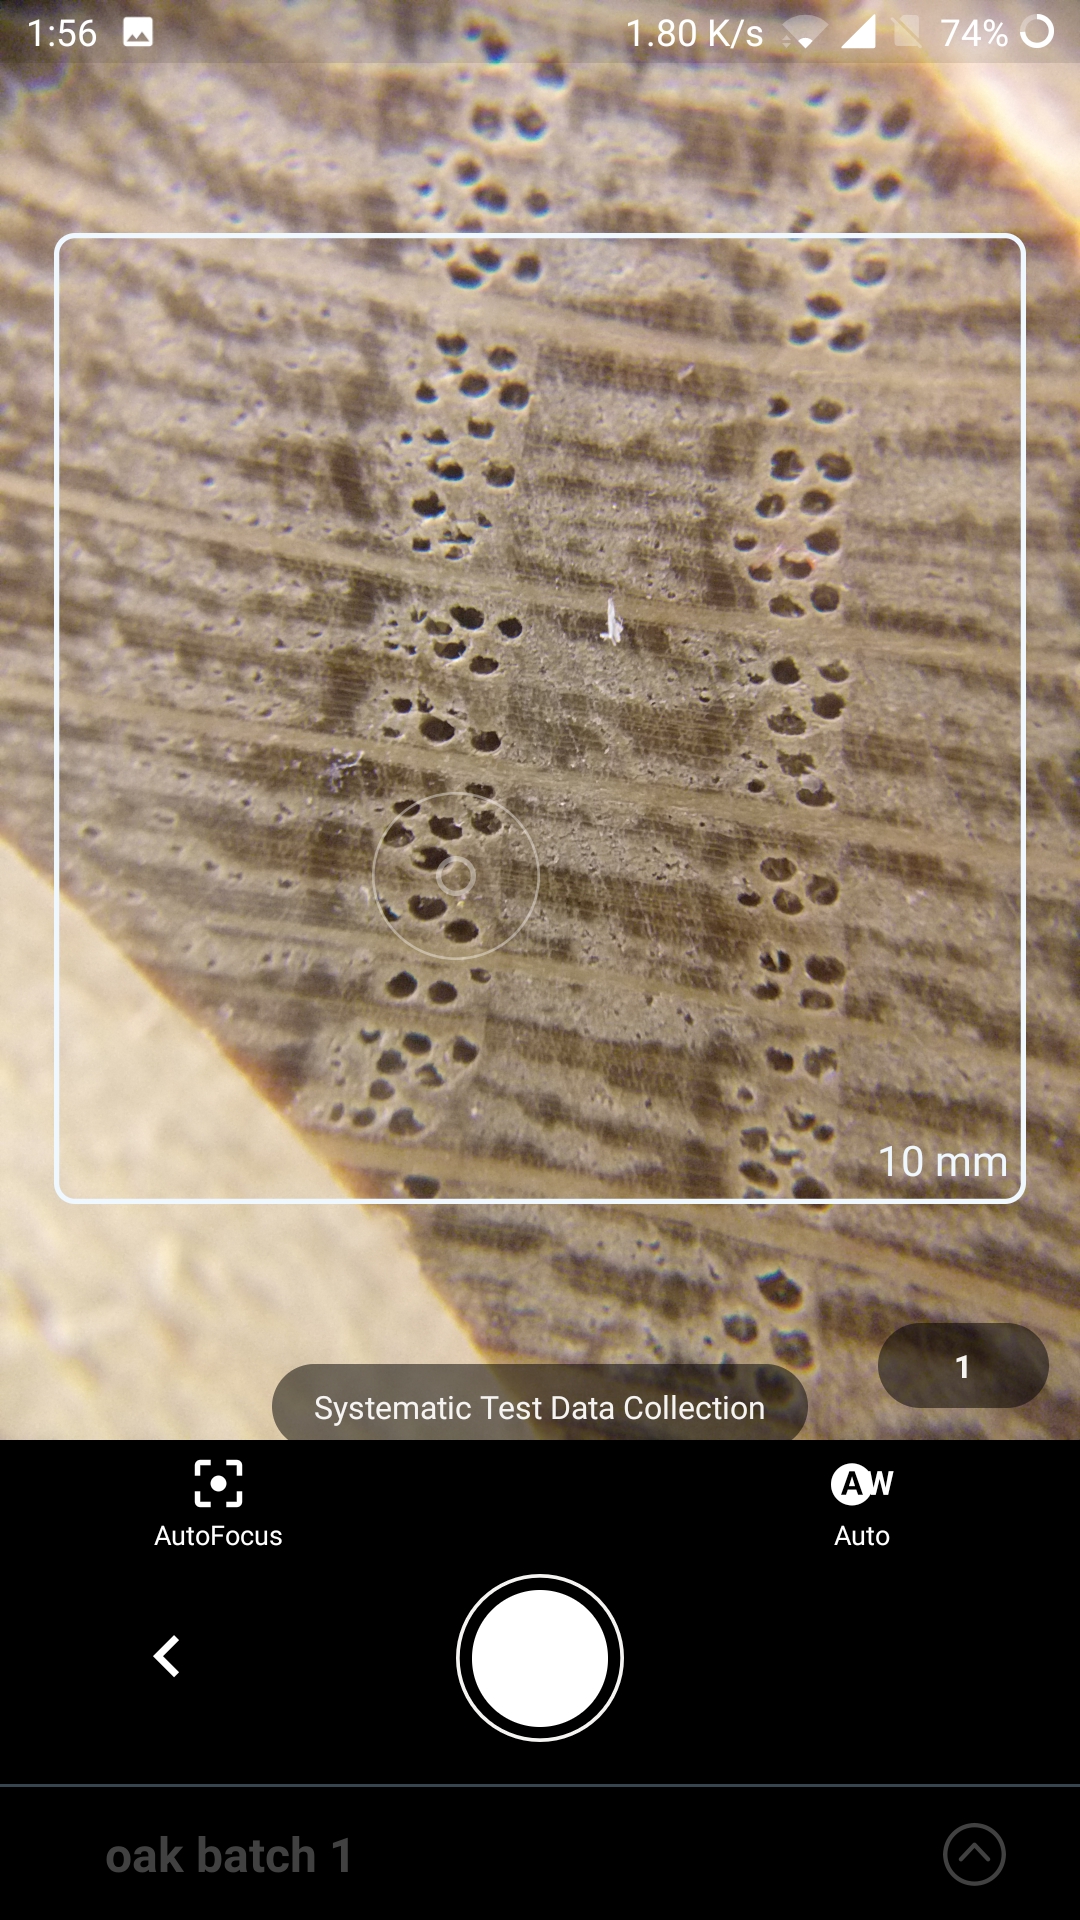
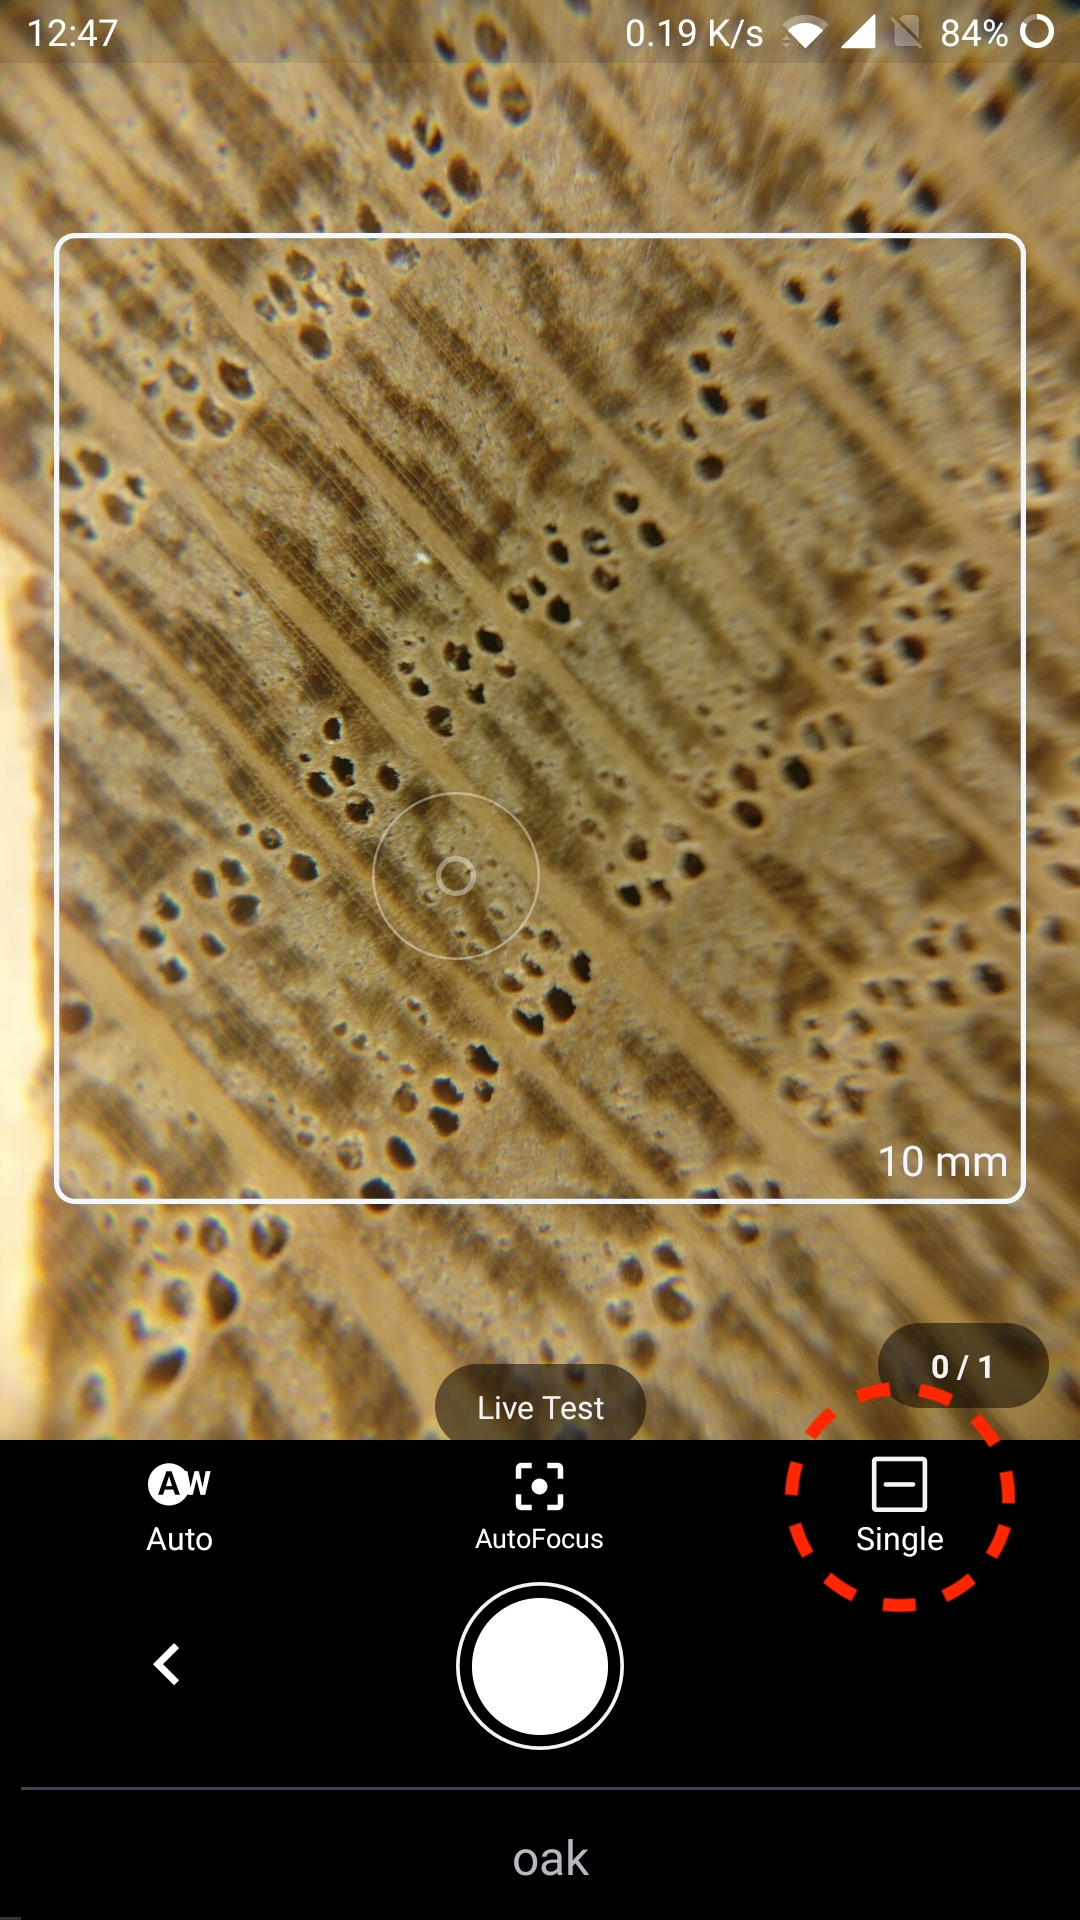
Capture macroscopic images of the wood surface. Make sure the images are clear and sharp in the center of the image as indicated by the highlighted area. Tap the white circle button below to take a picture.
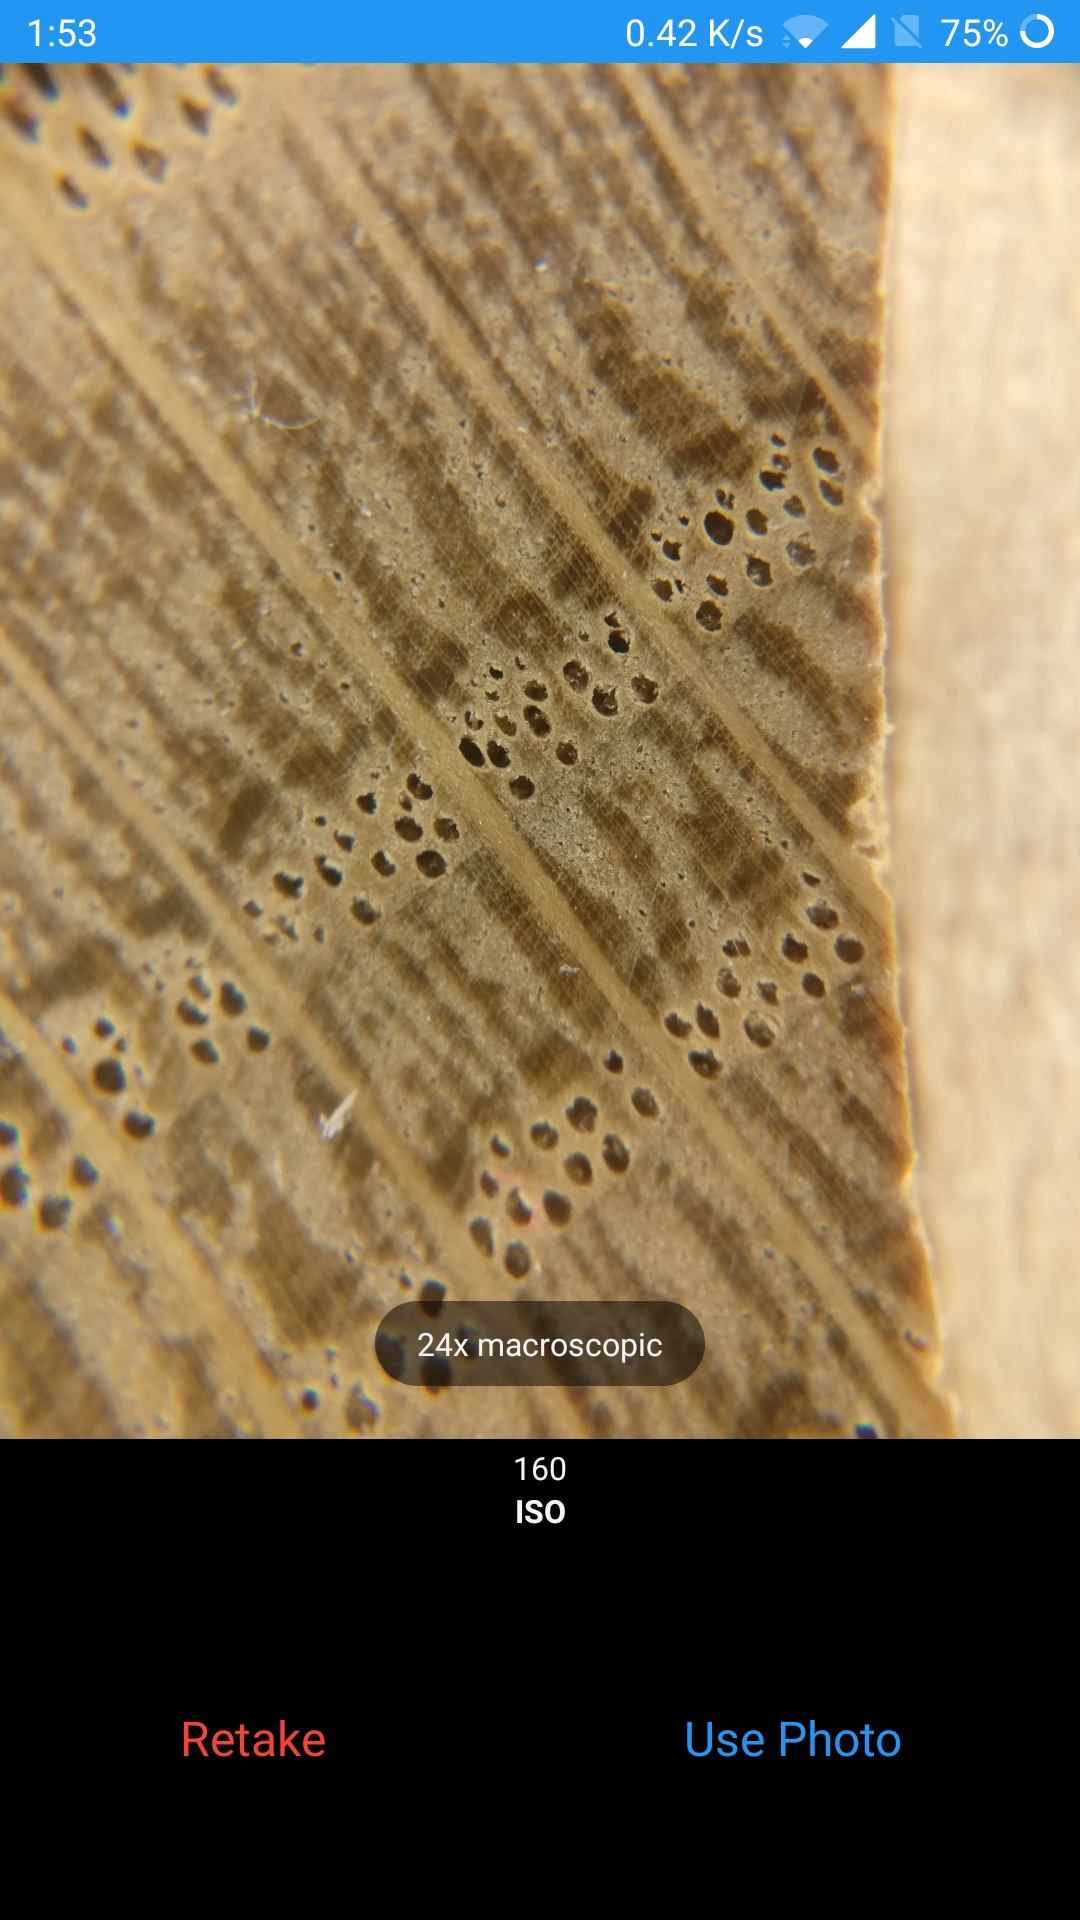
After the picture is taken, tap the right (Use Photo) button to confirm submission. If the picture appears unclear or has other issues that affect its usability, tap on the (Retake) button to retake the picture. Repeat the capturing process for more images.
After the image collection for the dataset is completed, you can check the dataset detail page by tapping on the dataset in the Dataset page. Repeat the process from steps 1–6 to collect images for multiple datasets.
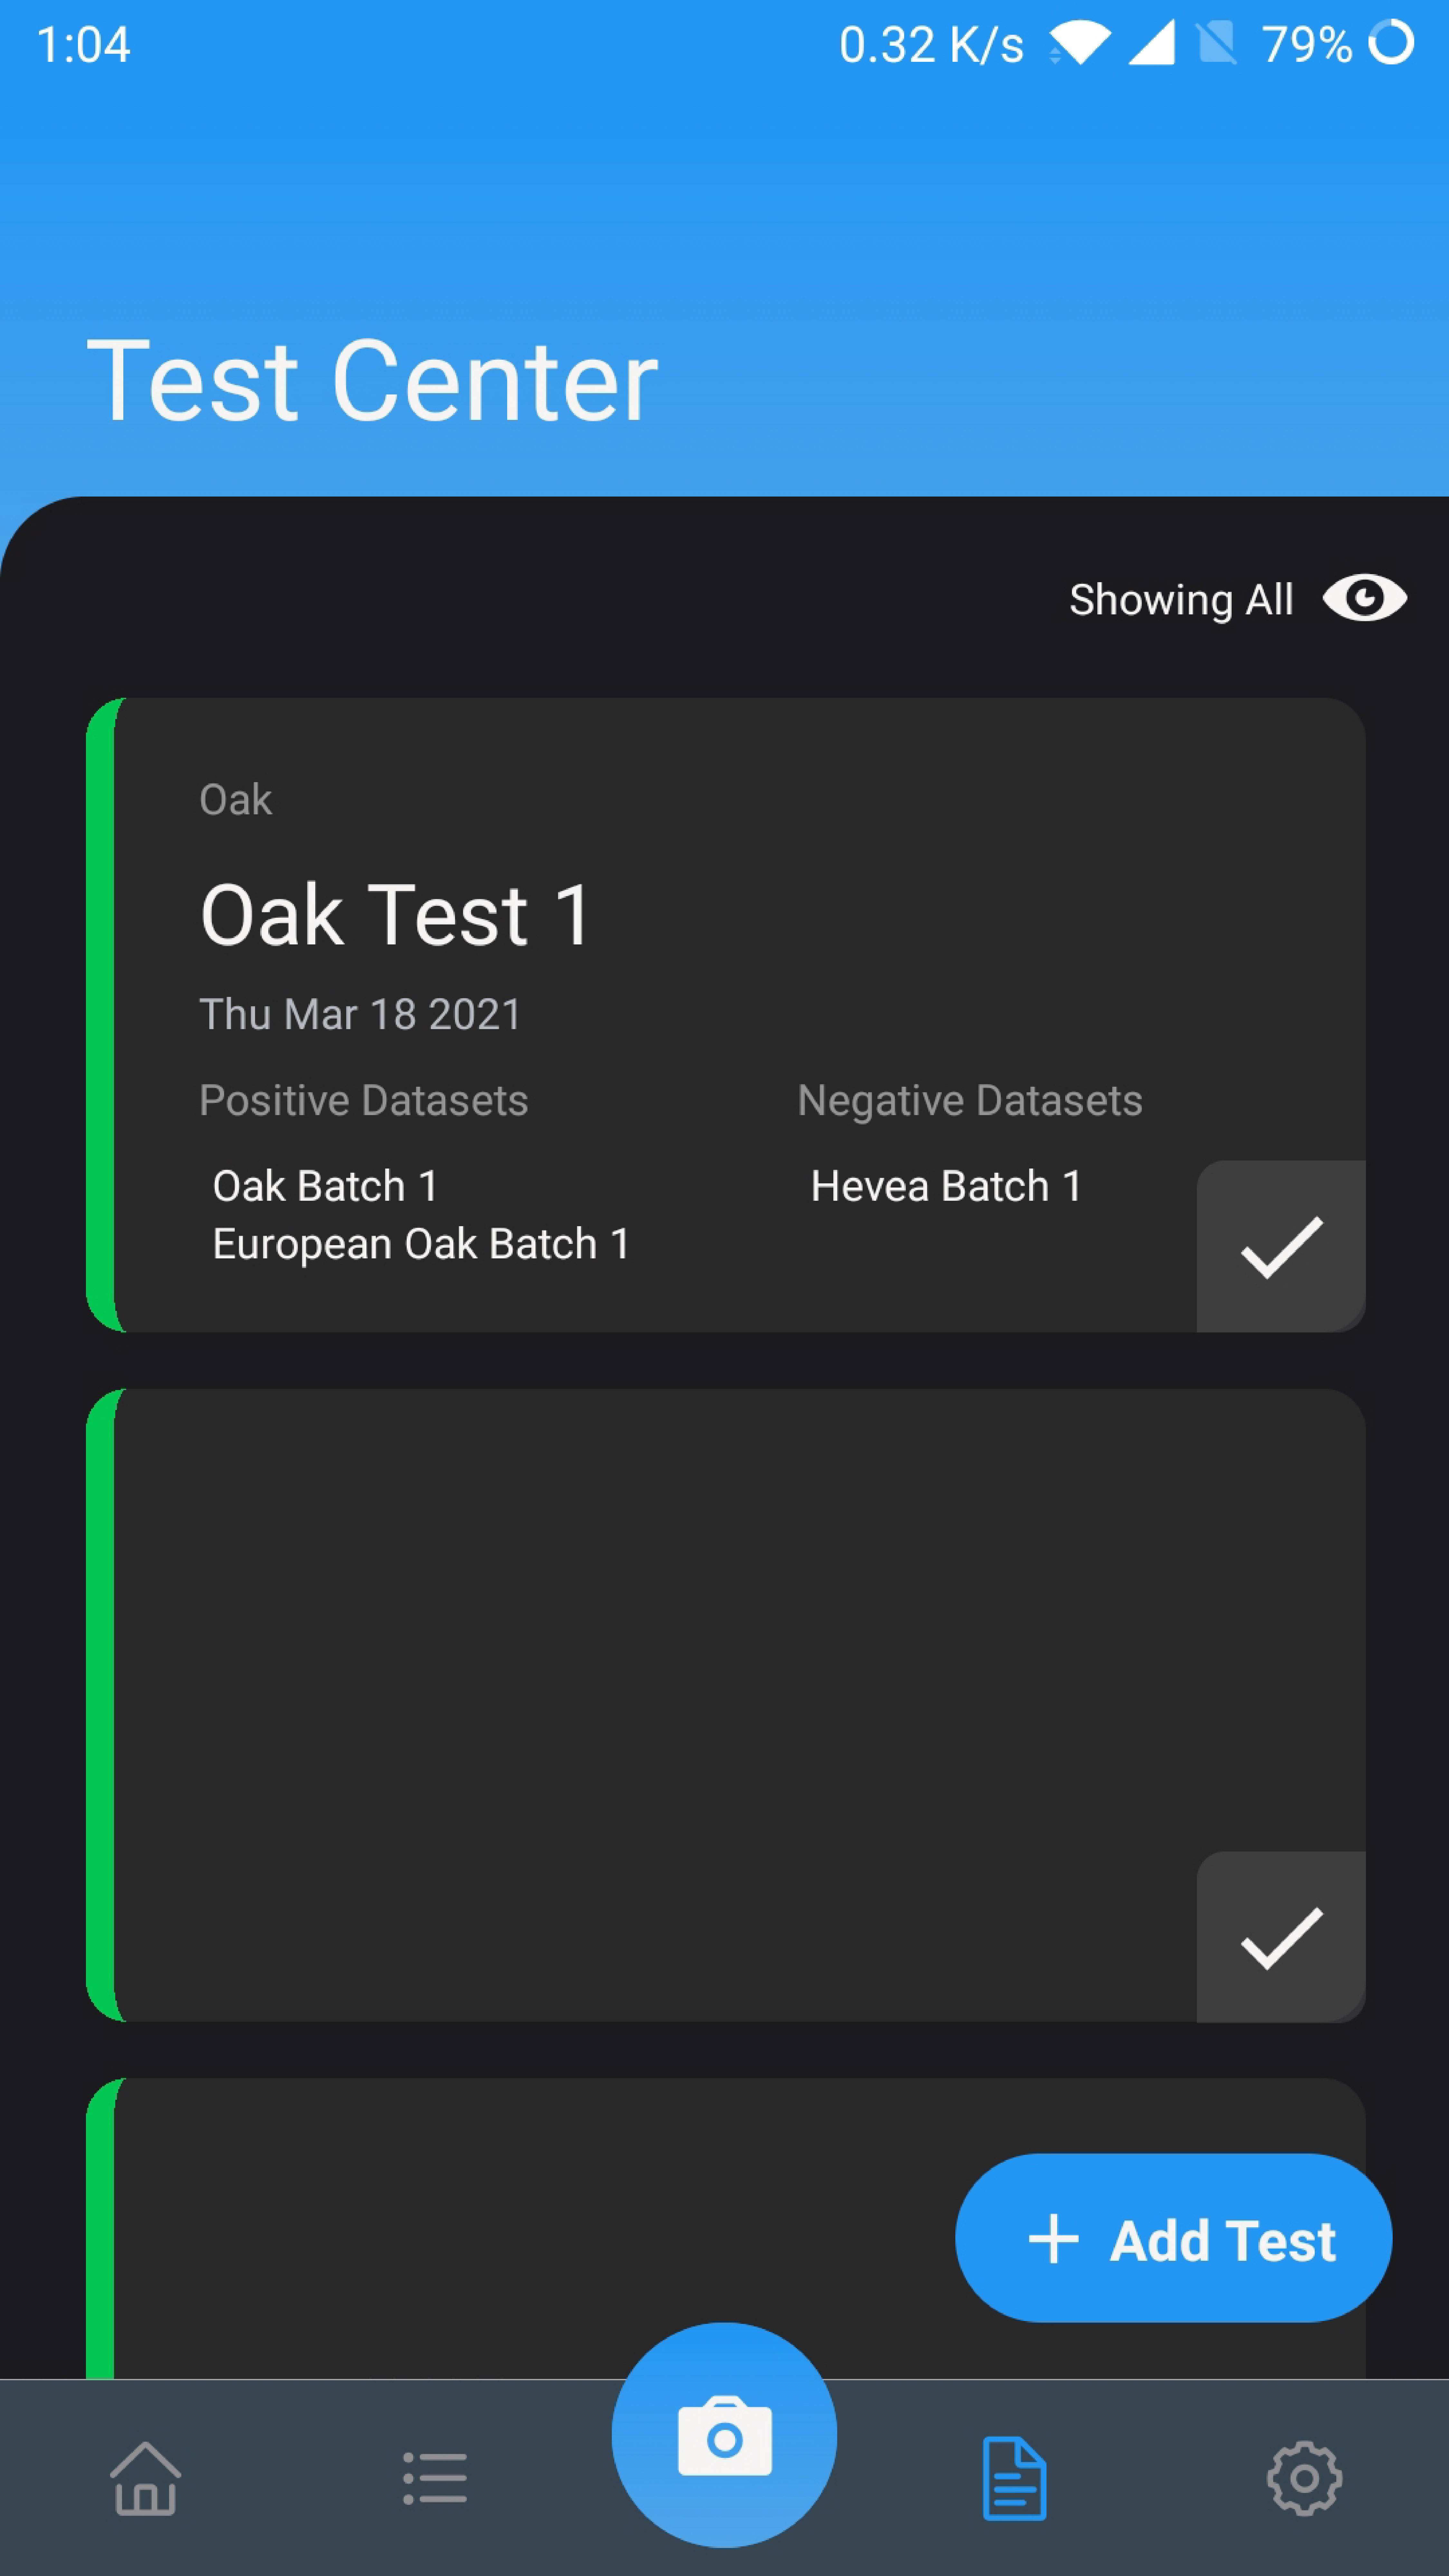
After all datasets are completed, navigate to the Test page or tap on the Create Test button to create a new test (as indicated by the highlighted red box).
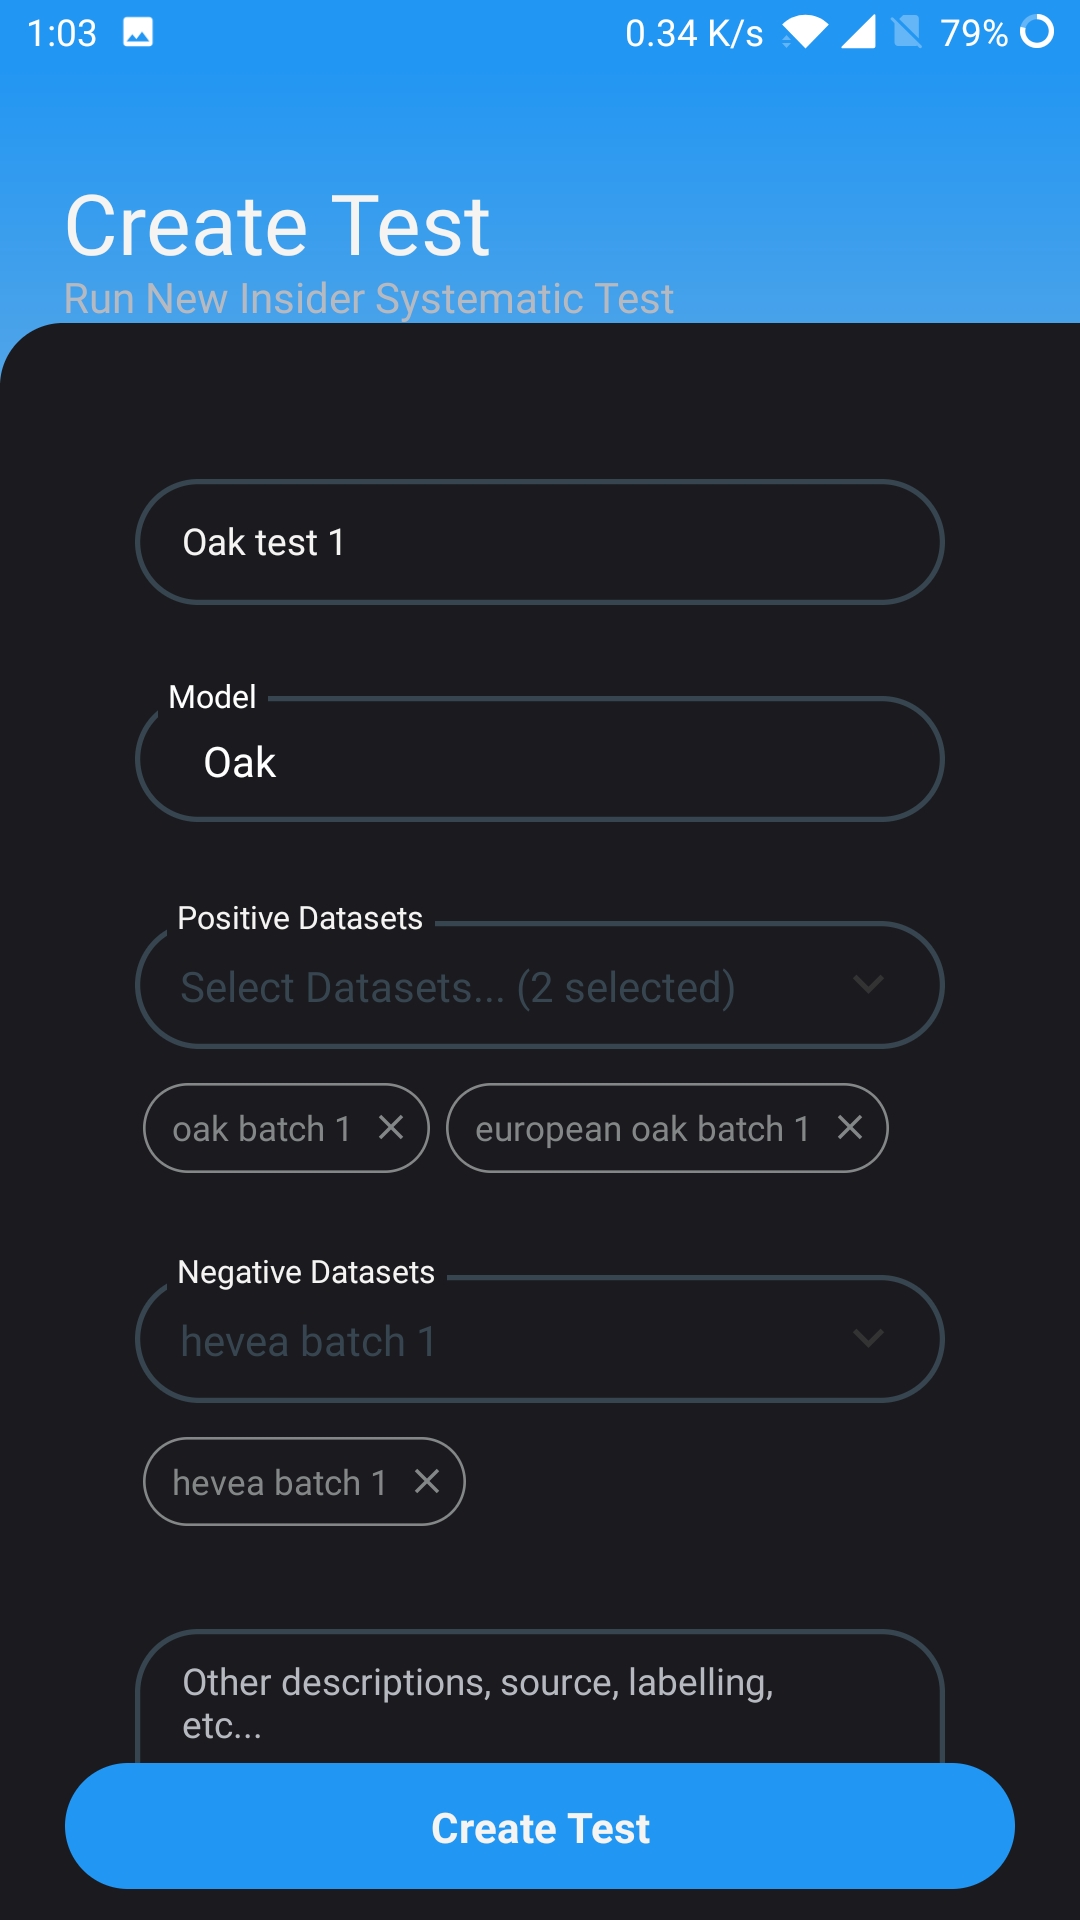
Create a new test by filling in the form accordingly. First:
- a) Type in the name of the test.
- b) Select the Model to be evaluated for this test.
- c) Select the datasets to be used as the positive datasets.
- d) Select the datasets to be used as the negative datasets (Optional).
- e) Enter any description for the test (Optional).
- f) Once all the information is filled in, create the test by tapping the "Create Test" button.
Once the test is created, it will be displayed in the Test page. Tap on it to proceed with further actions.
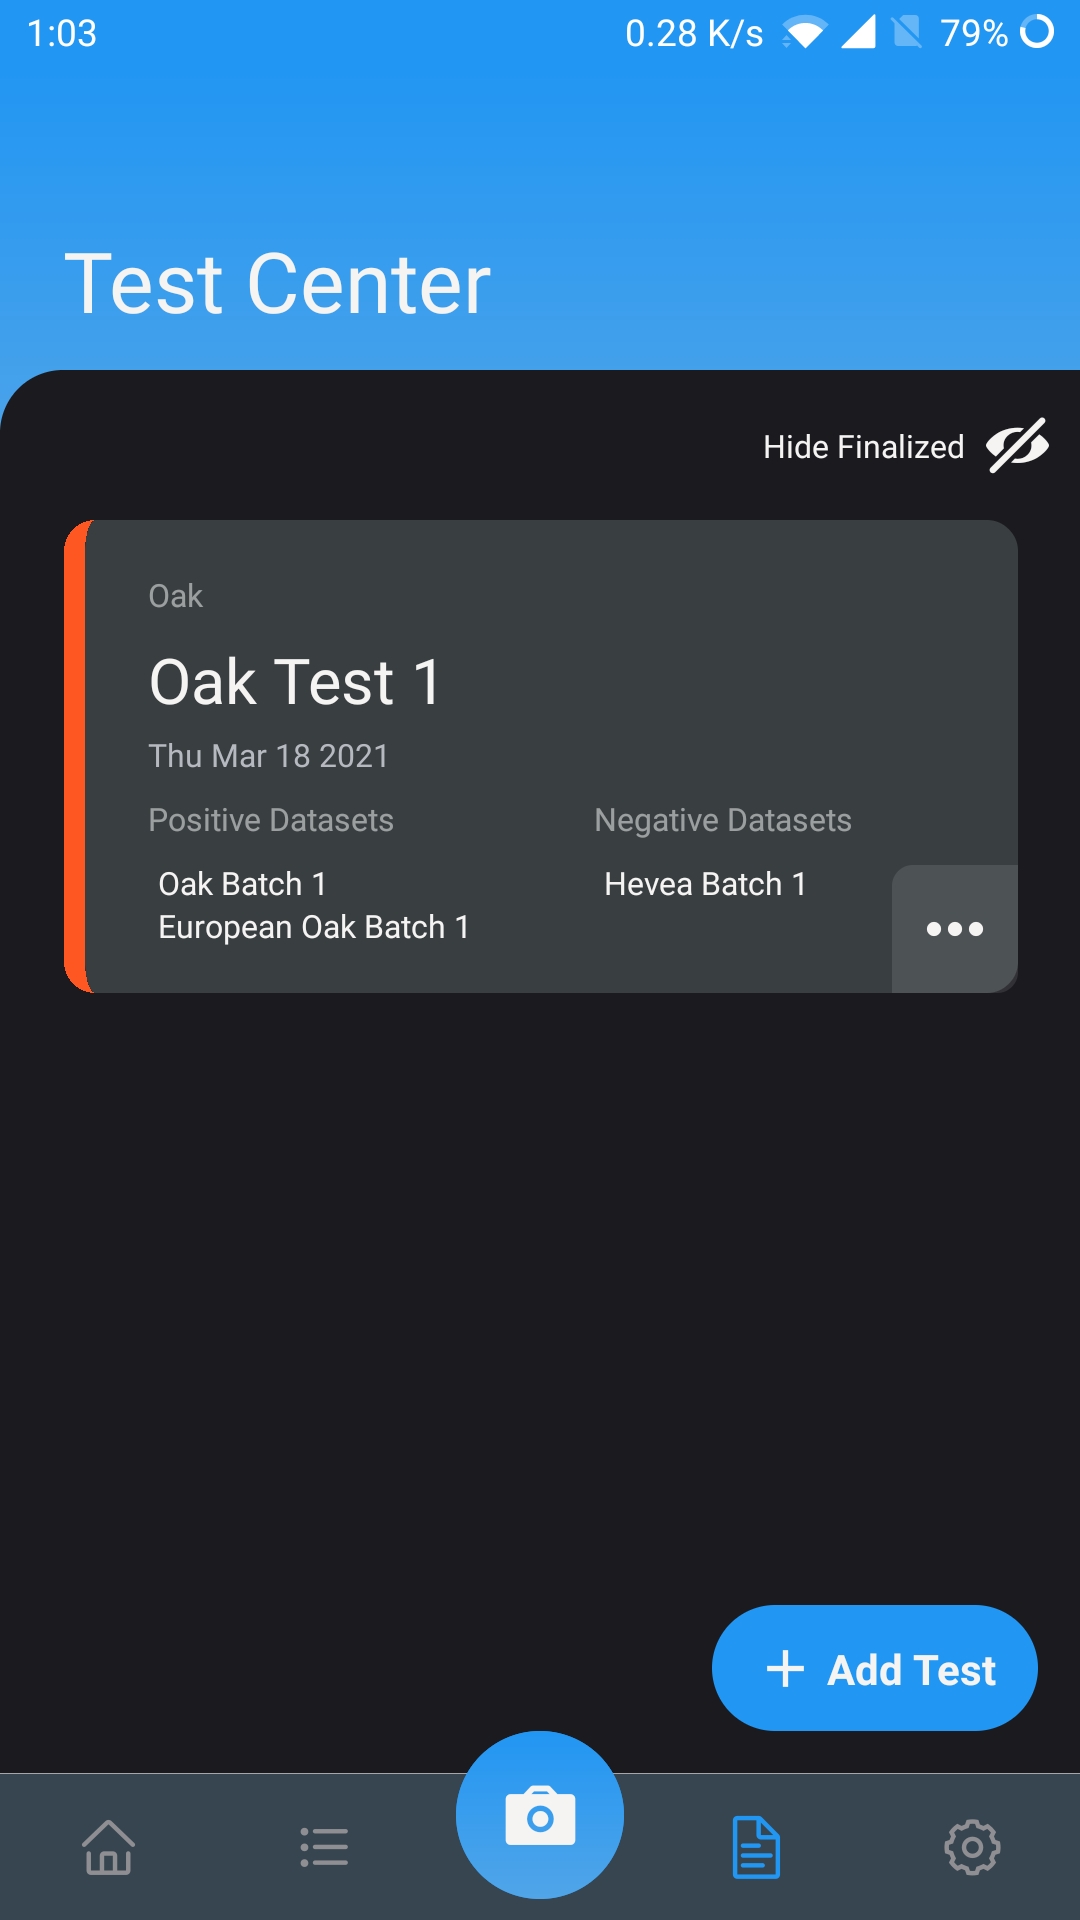
Tap on the action button at the right corner to show available actions. Select the Finalize button to submit the test for evaluation.
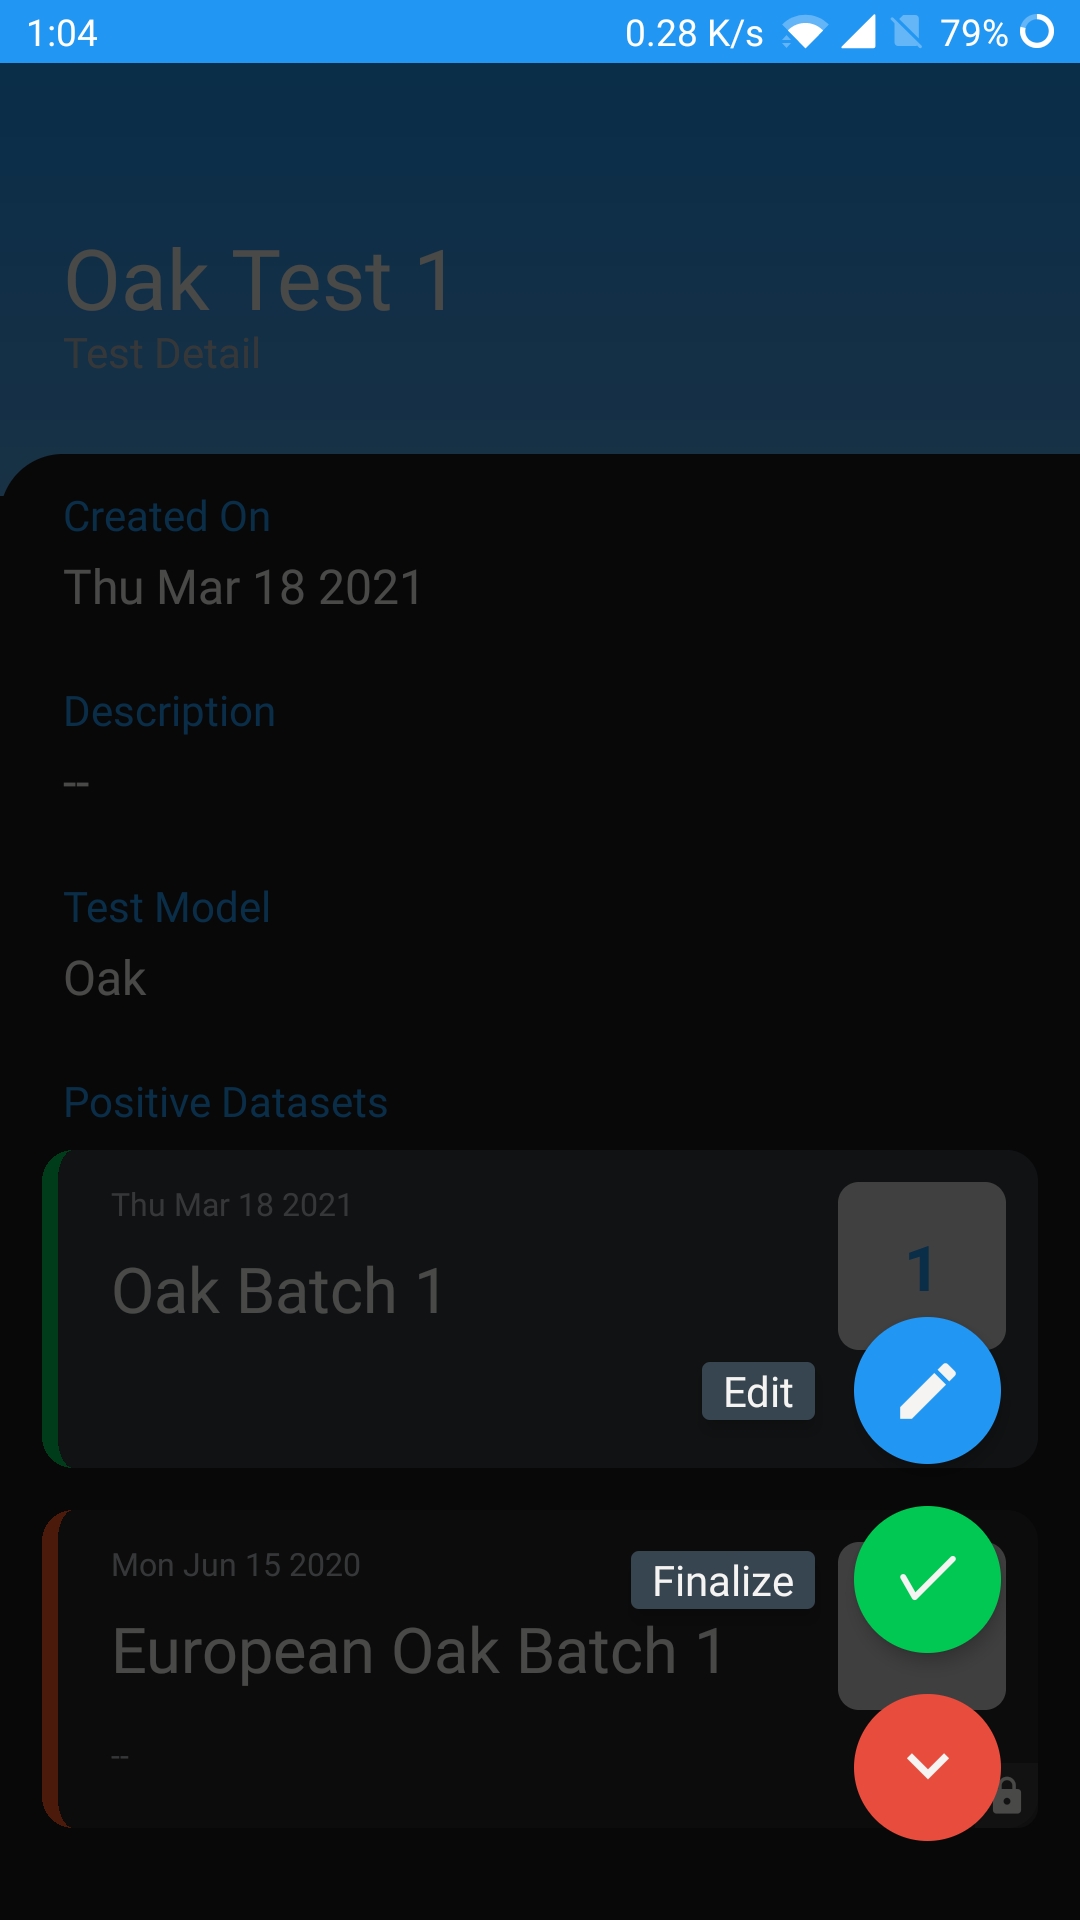
Once the test is finalized, the test and its associated datasets will not be allowed for further editing. The evaluation results and reports will be generated at the Xylorix Toolkit Insider section.
Live Test Guide
Tap on the Live Test button on the home page to open up the live test camera page. Select the model to be tested and capture the wood image. Tap on the highlighted button to switch capturing mode from 'Single' to 'Multi', which allows the user to capture 3 images of the same wood specimen to get a more accurate and consensus result.
The prediction result will be shown after the image is uploaded.

Further detail of captured images can be found in the gallery by tapping on the Gallery button on the home page.

Once the tests are completed, users can access the Xylorix Toolkit Insider to further evaluate model performance with more functionalities.